 弹吉他的兔子
1、页面国际化
新增国际化配置文件
idea首先要保证文件编码是UTF8
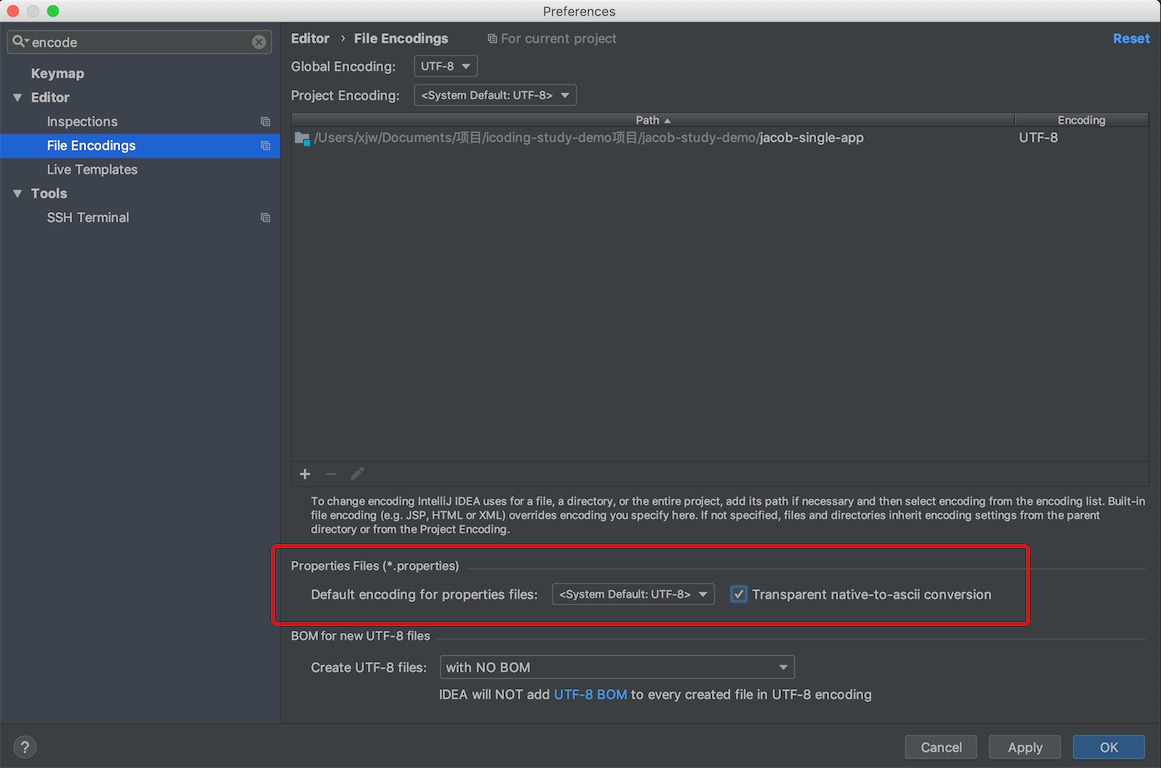
K8s(kubernetes) 中间有8个字母
i18n(internationalization 国际化) 中间有18个字母 ,在项目中建一个i18n文件夹,表示国际化配置
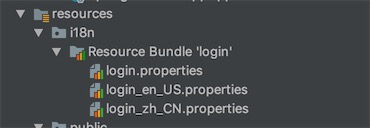
在resource目录下建一个i18n文件夹,并在该文件下建一个login.properties文件
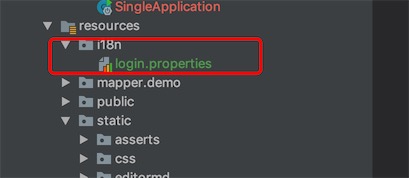
再建一个中文的配置文件login_zh_CN.properties

注意文件夹的变化,IDEA自动帮我们识别了国际化配置文件
这时候我们就可以快速的配置其他语言的配置文件了,如下图右键
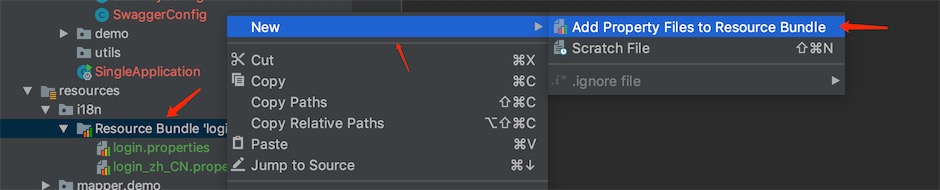
弹框中,点击加号
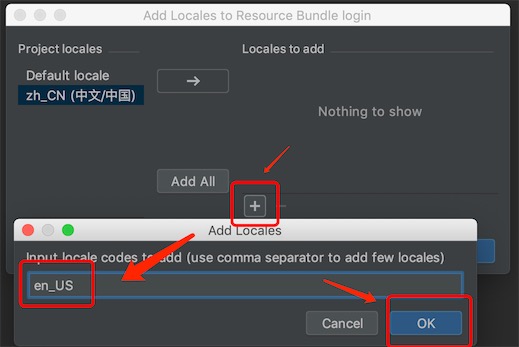
这时候我们发现已经添加类en_US 英文配置文件
配置键值对
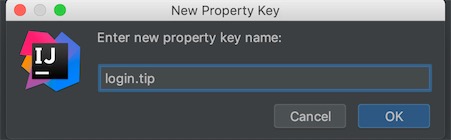
我们给这三个配置文件加一个属性,点击下图中添加按钮,然后再点击Resource Bundle视图
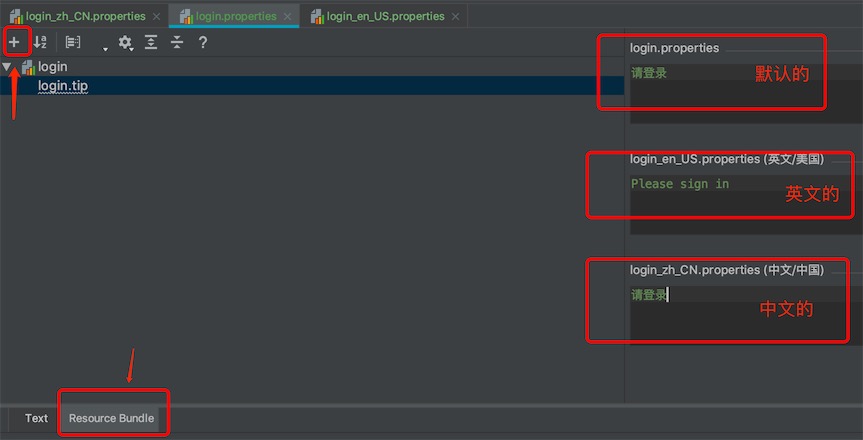
继续配置其他属性,最终完成的效果:

如果是一整个完整的页面,文章量十分大的时候,没必要做这些细节的国际化操作,直接路由到两个不同语言的页面就好。
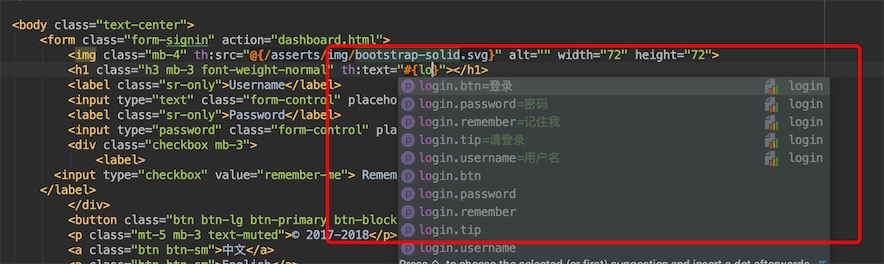
1、Thymeleaf配置国际化
看官方文档,我们知道使用#来获取国际化的配置变量值
Message Expressions: #{…} 国际化内容获取!
2、还需要让项目识别我们的国际化配置
首先我们全局搜索MessageSourceAutoConfiguration 分析源码,它是国际化消息读取的自动配置类
每一个AutoConfiguration都会绑定一个Properties,Properties绑定到我们的application.properties配置文件,所以我们可以在application.properties修改配置属性
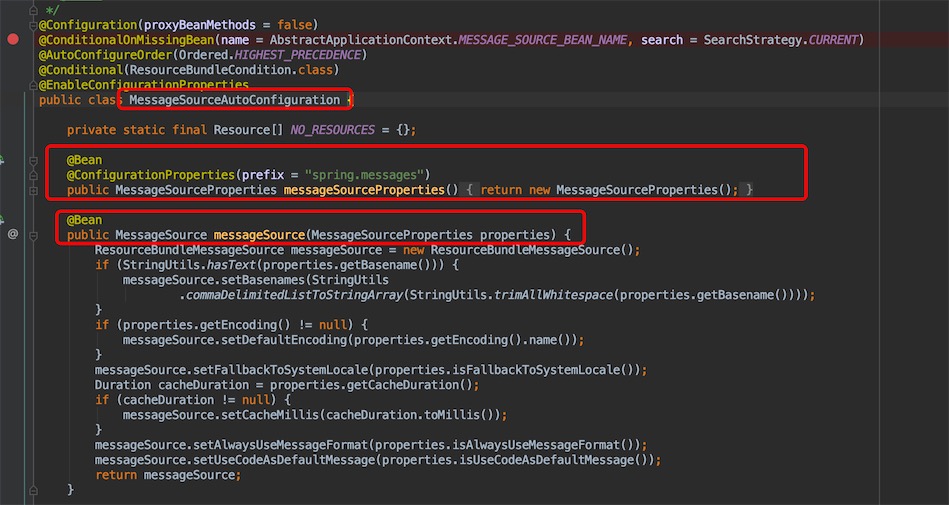
@Bean
public MessageSource messageSource(MessageSourceProperties properties) {
  ResourceBundleMessageSource messageSource = new ResourceBundleMessageSource();
  if (StringUtils.hasText(properties.getBasename())) {
    messageSource.setBasenames(StringUtils
                               .commaDelimitedListToStringArray(StringUtils.trimAllWhitespace(properties.getBasename())));
  }
  // 获取properties的编码信息
  if (properties.getEncoding() != null) {
    messageSource.setDefaultEncoding(properties.getEncoding().name());
  }
  messageSource.setFallbackToSystemLocale(properties.isFallbackToSystemLocale());
  Duration cacheDuration = properties.getCacheDuration();
  if (cacheDuration != null) {
    messageSource.setCacheMillis(cacheDuration.toMillis());
  }
  messageSource.setAlwaysUseMessageFormat(properties.isAlwaysUseMessageFormat());
  messageSource.setUseCodeAsDefaultMessage(properties.isUseCodeAsDefaultMessage());
  return messageSource;
}
这里我们需要在application.properties配置MessageSourceProperties的basename属性
# 配置绑定国际化的login路径,不加classpath,默认从根路径resource下读取
spring.messages.basename=i18n.login
配置完后,可以在我们的前端页面看到提示,如我们这里的login.html显示了前面配置的国际化信息
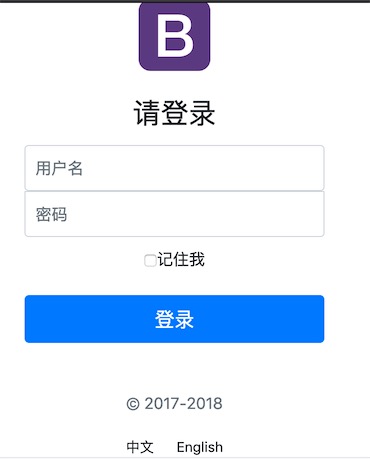
把前端内容填写完毕,重新启动项目,刷新页面,
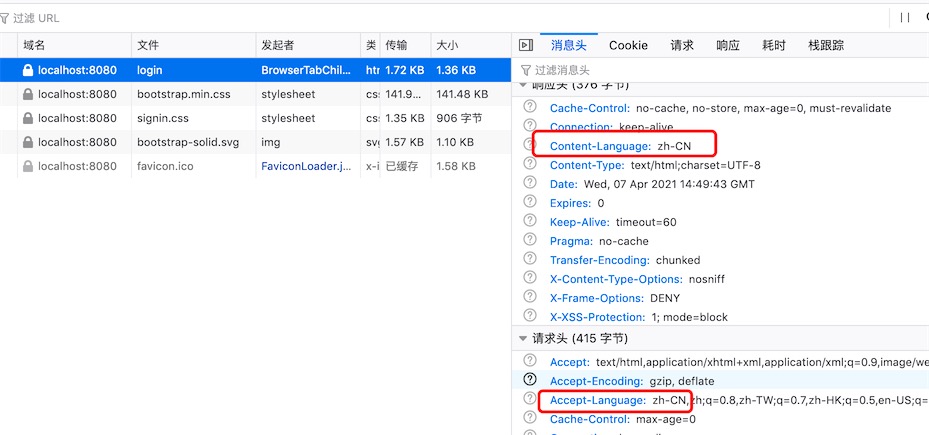
原理,请求头带有语言信息 Accept-Language
动态切换
理想效果,可以通过点击按钮实现动态切换
以Duubo官网为例
中文:https://dubbo.apache.org/zh/
英文:https://dubbo.apache.org/en/
可以发现是通过不同链接来实现国际化映射的!
在Spring中,有一个国际化对象Locale,它是Java的一个原生对象!我们在WebMvcAutoConfiguration自动配置类中,搜索locale
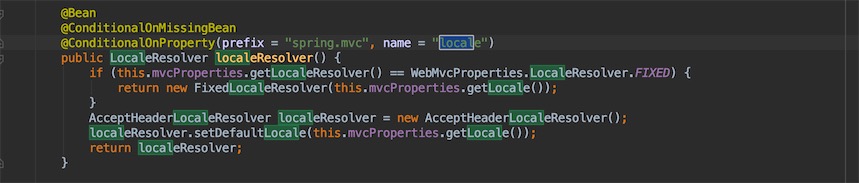
发现Springboot 帮我们自动注入了国际化的组件 localResolver
@Bean
@ConditionalOnMissingBean // 不存在这个bean才生效
@ConditionalOnProperty(prefix = "spring.mvc", name = "locale")
public LocaleResolver localeResolver() {
  // 如果用户没配置国际化解析对象,就使用默认的
  if (this.mvcProperties.getLocaleResolver() == WebMvcProperties.LocaleResolver.FIXED) {
    return new FixedLocaleResolver(this.mvcProperties.getLocale());
  }
  // 否则,使用接受请求头关于国际化的对象
  AcceptHeaderLocaleResolver localeResolver = new AcceptHeaderLocaleResolver();
  localeResolver.setDefaultLocale(this.mvcProperties.getLocale());
  return localeResolver;
}
重点在AcceptHeaderLocaleResolver,点击它的源码
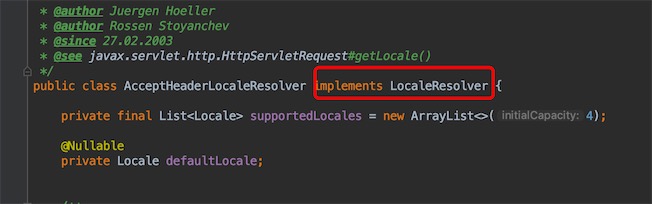
它实现了LocalResolver接口,我们找到它重写的方法(看一个类的3个主要地方:构造函数、init方法、重写方法)
@Override
public Locale resolveLocale(HttpServletRequest request) {
  Locale defaultLocale = getDefaultLocale();
  // 从request请求中获取Accept-Language的语言信息
  if (defaultLocale != null && request.getHeader("Accept-Language") == null) {
    return defaultLocale; // 返回默认的国际化对象
  }
  Locale requestLocale = request.getLocale(); // 得到请求中的国际化信息
  List<Locale> supportedLocales = getSupportedLocales();
  if (supportedLocales.isEmpty() || supportedLocales.contains(requestLocale)) {
    return requestLocale; // 返回请求的国际化对象
  }
  Locale supportedLocale = findSupportedLocale(request, supportedLocales);
  if (supportedLocale != null) {
    return supportedLocale; // 返回支持的国际化对象,具体看源码中的findSupportedLocale方法
  }
  return (defaultLocale != null ? defaultLocale : requestLocale);
}
我们要定义一个国际化请求解析器,让Spring使用我们请求的国际化解析器
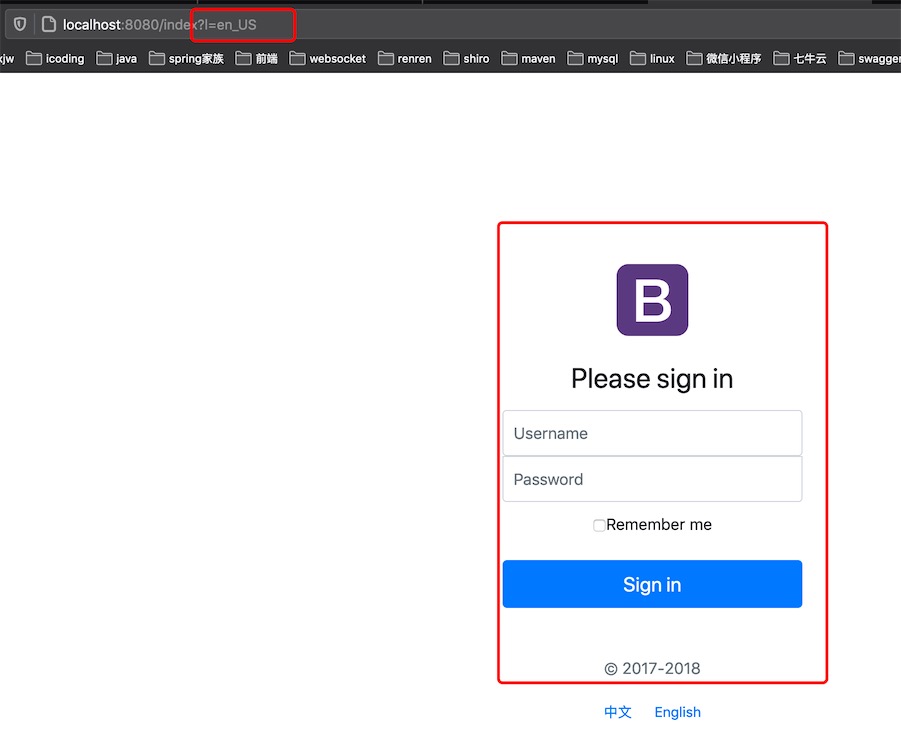
1、修改前端页面的点击链接
<!-- localhost:8080/index?l=zh_CN thymeleaf中传递参数不用使用? 使用()-->
<a class="btn btn-sm" th:href="@{/index(l='zh_CN')}">中文</a>
<a class="btn btn-sm" th:href="@{/index(l='en_US')}">English</a>
2、实现LocalResolver接口
点击Locale,看源码里有很多已经定义的国家和语言
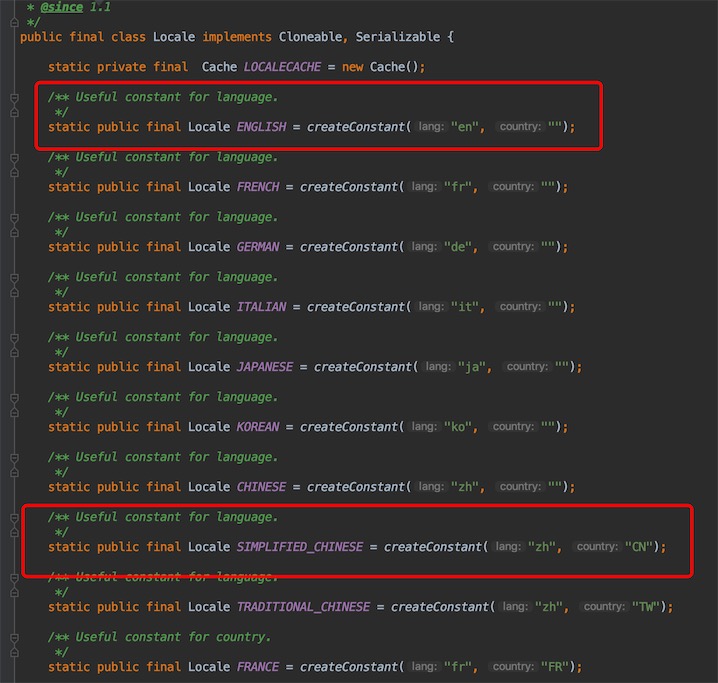
看构造函数
public Locale(String language) {
  this(language, "", "");
}
public Locale(String language, String country) {
  this(language, country, "");
}
/**
     * This method must be called only for creating the Locale.*
     * constants due to making shortcuts.
     */
private static Locale createConstant(String lang, String country) {
  BaseLocale base = BaseLocale.createInstance(lang, country);
  return getInstance(base, null);
}
自定义国家化处理器
public class MyLocaleResolver implements LocaleResolver {
	@Override
	public Locale resolveLocale(HttpServletRequest request) {
		String language = request.getParameter("l");
		Locale locale = Locale.getDefault(); // 如果我们没有配置,就使用默认的
		if(!StringUtils.isEmpty(language)){
			String[] split = language.split("_");
			locale = new Locale(split[0],split[1]); // 创建国际化对象
		}

		return locale;
	}

	@Override
	public void setLocale(HttpServletRequest request, HttpServletResponse response, Locale locale) {

	}
}
3、注册到spring容器中
@Configuration
public class MyMvcConfig implements WebMvcConfigurer {

	@Override
	public void addViewControllers(ViewControllerRegistry registry) {
		// 视图跳转的控制!
		registry.addViewController("/index").setViewName("login2");
		registry.addViewController("/").setViewName("login2");
		registry.addViewController("/index.html").setViewName("login2");
	}

  // 注意bean的id 只能为localeResolver,因为Springboot会去扫描并识别
	@Bean
	public LocaleResolver localeResolver(){
		return new MyLocaleResolver();
	}
}
重启项目,点击测试
后端国际化信息返回
正常配置国际化信息文件/resource/i18n/fsc_message

创建枚举类RccErrorEnum,统一错误信息
public enum RccErrorEnum implements ErrorInterface, EnumInterface<String>, BaseEnum {
    OK("000000", "操作成功"),
    FAIL("999999", "操作失败"),
    ID_NOT_NULL("PRT002", "主键id不能为空"),
    FOREIGN_KEY_NOT_NULL("PRT003", "外键不能为空"),
    HEAD_TABLE_ID_NOT_NULL("PRT004", "头表id不能为空"),
    ERROR_MESSAGE("errorMessage", "errorMessage"),
    ERROR_PERIOD_FORMAT("ERROR_PERIOD_FORMAT","账期格式错误"),
    ERROR_PERIOD_PARAM("ERROR_PERIOD_PARAM","账期不能为空"),
    ERROR_PAGE_PARAM("ERROR_PAGE_PARAM","分页参数不正确"),
    ERROR_NO_DETAILS("ERROR_NO_DETAILS","没有未汇总的明细"),
    ERROR_ON_SUM("ERROR_ON_SUM","汇总处理失败,批次号{0}")
    ;
    private String code;
    private String message;

    RccErrorEnum(String code, String message) {
        this.code = code;
        this.message = message;
    }

  public String getMessage() {
    return MessageUtils.getMessage(LanguageConstants.LANGUAGE_ENUM_MAP.get(InitConfig.MODULE_LANGUAGE).getLocale(),
                                   "i18n/fsc_message", this.code);
  }

      @Override
    public String getMessage(Object... msgParams) {
        String message = MessageUtils.getMessage(LanguageConstants.LANGUAGE_ENUM_MAP.get(InitConfig.MODULE_LANGUAGE).getLocale(),
                "i18n/fsc_message", this.code, msgParams);
        String substring = message.substring(0, 4);
        if("系统错误".equals(substring)){
            message = message.substring(4);
        }
        return message;
    }
}
使用
public interface SaleReceiptRecFacade {
      static void assertParam(CommonRequest<CreateSrDetailReqDTO> request){
        Assert.isTrue(StringUtils.isNotBlank(request.getHeadParams().getTenantCode()), RccErrorEnum.ERROR_TENANT_PARAM.getMessage());
        Assert.isTrue(StringUtils.isNotBlank(request.getRestParams().getMerchantCode()), RccErrorEnum.ERROR_MERCHANT_CODE_PARAM.getMessage());
        Assert.isTrue(StringUtils.isNotBlank(request.getRestParams().getMerchantName()), RccErrorEnum.ERROR_MERCHANT_NAME_PARAM.getMessage());
        Assert.isTrue(StringUtils.isNotBlank(request.getRestParams().getPeriod()), RccErrorEnum.ERROR_PERIOD_PARAM.getMessage());
    }
}
自定义异常使用
static String getPeriodEnd(String period){
  try {
    Date dateStart = DateUtil.parse(period + "-01", "yyyy-MM-dd").toJdkDate();
    DateTime dateTime = DateUtil.endOfMonth(dateStart);
    return dateTime.toDateStr();
  } catch (Exception e) {
    LogFactory.get().error("账期格式错误",e);
    throw new BussinessException(RccErrorEnum.ERROR_PERIOD_FORMAT);
  }
}
BussinessException的构造方法
public BussinessException(ErrorInterface errorEnum, Object... msgParam) {
  this(errorEnum, errorEnum.getMessage(msgParam));
}

private BussinessException(ErrorInterface errorEnum, String errorMsg) {
  super(errorMsg);
  this.printLog = 0;
  this.rootCauseMsgList = new ArrayList();
  this.errorCode = errorEnum.getMsgKey();
  this.errorMsg = errorMsg;
  this.appendRootCauseMsg(errorEnum, errorMsg);
}
2、拦截登录
在开发的过程把thymeleaf的页面缓存禁用,避免修改页面重启项目
spring.thymeleaf.cache=false
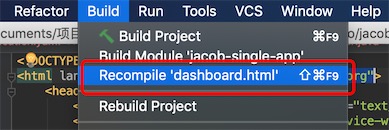
修改了页面后,重新编译html页面
登录方面,我整合了springSecurity框架,配置了除首页和登录页面放开,其他页面都要登录后才能访问
@Configuration
@EnableWebSecurity
public class SecurityConfig extends WebSecurityConfigurerAdapter {
	// 授权规则
	@Override
	protected void configure(HttpSecurity http) throws Exception {
		// htpp的方法基本分为4个类别:过滤器,登录注销规则,安全配置,OAuth2配置
		// 一般我们只配置规则即可
		// 首页允许所有人访问
		http.authorizeRequests().antMatchers("/","/toLogin").permitAll()
				.antMatchers("/level1/**").hasRole("vip1")
				.antMatchers("/level2/**").hasRole("vip2")
				.antMatchers("/level3/**").hasRole("vip3")
				.antMatchers("/*").authenticated();

//		表单登录用户和密码的默认参数名是username和password
		http.formLogin()
				//.defaultSuccessUrl("/dashboard") // 设置默认登录成功后跳转的页面
				.loginProcessingUrl("/login") // 登陆表单提交请求,默认的提交登录请求是/login(Post请求),认证失败默认会跳转到/login?error(Get请求)
				.loginPage("/toLogin"); // 默认的登录页请求是/login(Get请求)

		// 注销,默认开启的注销功能
		http.logout().logoutSuccessUrl("/");    // 注销成功跳转到首页

		// 自定义的登录页需要配置 rememberMe 的参数名,就可以绑定到我们前端的!
		// 记住我功能
		http.rememberMe().rememberMeParameter("remember");
	}
拦截器实现
没有整合安全框架,我们通过实现接口HandlerInterceptor的方式,去拦截登录,要用户登录了才能访问页面。
登录请求
@PostMapping("/user/login")
public String login(@RequestParam("username") String username,
                    @RequestParam("password") String password,
                    Model model, HttpSession session){

  // 真实的操作应该去数据库中获取数据
  if (!StringUtils.isEmpty(username) && "123456".equals(password)){
    // 登录成功,放入Session
    session.setAttribute("loginUser",username);
    System.out.println(session.getAttribute("LoginUser"));
    return "redirect:/main.html"; // 转发和重定向!
  }else {
    model.addAttribute("msg", "用户名和密码输入错误");
    return "login";
  }
}
1、编写拦截器
public class LoginInterceptor implements HandlerInterceptor {
  // false  拦截
  // true 通过放行
  @Override
  public boolean preHandle(HttpServletRequest request, HttpServletResponse response, Object handler) throws Exception {

    String user = (String) request.getSession().getAttribute("loginUser");
    System.out.println(user);
    System.out.println("=====LoginInterceptor=====");
    if (user==null){ // 未登录,不放行,并且跳转到登录页!
      request.setAttribute("msg","未登录,请先登录!");
      // response.sendRedirect("/") ; 重定向
      request.getRequestDispatcher("/index.html").forward(request,response); // 转发
      return false;
    }else {
      // 放行
      return true;
    }
  }
}
2、注册拦截器
前面说过SpringBoot会对MVC自动配置,看官方文档知道,我们可以实现WebMvcConfigurer接口来添加自己的一些自定义配置,然后重写它的方法就可以了,如常用的静态资源映射、拦截、路由控制
@Configuration
//@EnableWebMvc
public class MyMvcConfig implements WebMvcConfigurer {

  @Override
  public void addViewControllers(ViewControllerRegistry registry) {
    // 视图跳转的控制!
    registry.addViewController("/index").setViewName("index");
    registry.addViewController("/").setViewName("index");
    registry.addViewController("/index.html").setViewName("index");
    registry.addViewController("/toLogin").setViewName("login2");
  }

  // 注册拦截器
  @Override
  public void addInterceptors(InterceptorRegistry registry) {
    // 拦截器需要放行第一次登录的请求,否则就用户为null 了
    registry.addInterceptor(new LoginInterceptor())
      .addPathPatterns("/**")
      .excludePathPatterns("/index.html","/","index","/asserts/**","/toLogin","/user/login");
    // 放开首页、登录页、登录请求的拦截
  }

  // 注册我们的国际化组件
  // id localeResolver只能为这个,因为SpringBoot会去扫描并识别
  @Bean
  public LocaleResolver localeResolver(){
    return new MyLocaleResolver();
  }
}
3、Thymeleaf页面
员工列表
# restFul风格api请求
/emp/get、post、delete、put
抽取公共部分
<!-- 声明模版 -->
<!DOCTYPE html>
<html xmlns:th="http://www.thymeleaf.org">
<body>
<div th:fragment="copy">
© 2011 The Good Thymes Virtual Grocery
</div>
</body>
</html>
<!-- 引用 -->
<body> ...
<div th:insert="~{footer :: copy}"></div>
</body>
<!-- 或者 -->
<body> ...
<div th:insert="footer :: copy"></div>
</body>
<!-- 区别 -->
<body> ...
<div th:insert="footer :: copy"></div>
<div th:replace="footer :: copy"></div>
<div th:include="footer :: copy"></div>
</body>
<!-- 比较结果 -->
<body> ...
<div>
<footer> © 2011 The Good Thymes Virtual Grocery </footer>
</div>
<footer> © 2011 The Good Thymes Virtual Grocery </footer>
<div> © 2011 The Good Thymes Virtual Grocery </div>
</body>
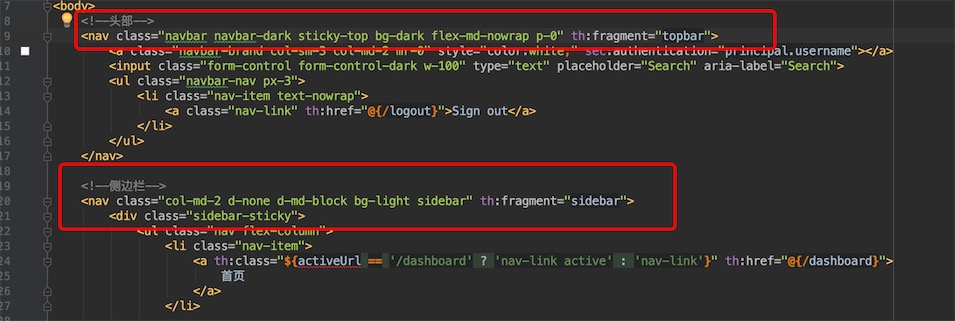
抽取头部与侧边栏公共部分bar.html,放到common目录下
前端页面复用模块
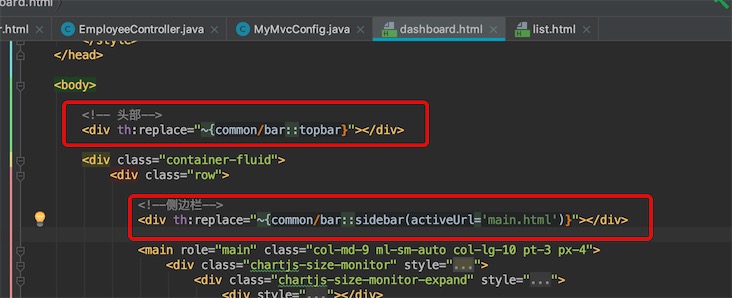
传递参数:
<div th:replace="::frag (onevar=${value1},twovar=${value2})">
遍历后端传递的数据
<table class="table table-striped table-sm">
  <thead>
    <tr>
      <th>id</th>
      <th>lastName</th>
      <th>email</th>
      <th>gender</th>
      <th>department</th>
      <th>birth</th>
      <th>操作</th>
    </tr>
  </thead>
  <tbody>
    <tr th:each="emp:${employeeList}">
      <td th:text="${emp.id}"></td>
      <!--/* inline模式 */-->
      <td>[[${emp.lastName}]]</td>
      <td th:text="${emp.email}"></td>
      <td th:text="${emp.gender == 0?'女':'男'}"></td>
      <td th:text="${emp.getEDepartment().departmentName}"></td>
      <td th:text="${#dates.format(emp.birth,'yyyy-MM-dd HH:mm')}"></td>
      <td>
        <!--/* 编辑或者删除某个用户,这里是IDEA不识别,不是错误!*/-->
        <a th:href="@{/employee/} + ${emp.id}" type="button" class="btn btn-sm btn-primary">编辑</a>
        <a th:href="@{/employee/delete/} + ${emp.id}" type="button" class="btn btn-sm btn-danger">删除</a>
      </td>
    </tr>

  </tbody>
</table>
最终效果
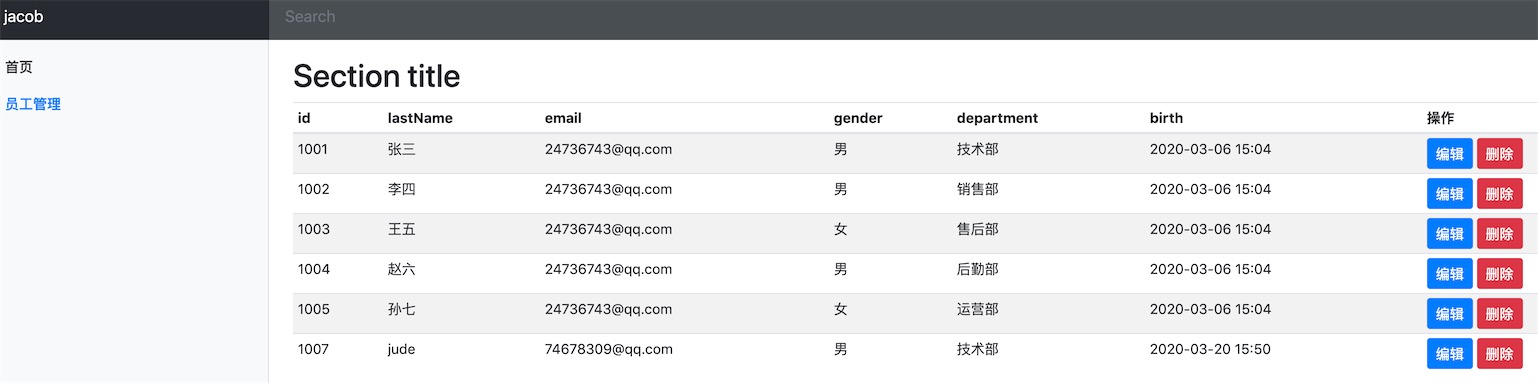
添加员工
跳转到前端页面
// 跳转到员工新增页面
@GetMapping("/add")
public String addEmployee(Model model){
  // 应该要携带部门的数据信息
  List<Department> departmentList = departmentMapper.listDepartment();
  model.addAttribute("departmentList",departmentList);
  return "emp/add";
}
前端页面
<form th:action="@{/employee/add}" method="post">
  <div class="form-group">
    <label>LastName</label>
    <input type="text" class="form-control" name="lastName" placeholder="jacob">
  </div>
  <div class="form-group">
    <label>Email</label>
    <input type="text" class="form-control" name="email" placeholder="747463168@qq.com">
  </div>
  <div class="form-group">
    <label>Gender</label>
    <div class="form-inline">
      <div class="form-check form-check-inline">
        <input class="form-check-input" type="radio" name="gender" id="gender1" value="1">
        <label class="form-check-label" for="gender1">男</label>
      </div>
      <div class="form-check form-check-inline">
        <input class="form-check-input" type="radio" name="gender" id="gender2" value="0">
        <label class="form-check-label" for="gender1">女</label>
      </div>
    </div>
  </div>
  <div class="form-group">
    <label>Department</label>
    <select class="form-control" name="department">
      <option th:each="department:${departmentList}"
              th:text="${department.departmentName}"
              th:value="${department.id}">
      </option>
    </select>
  </div>
  <div class="form-group">
    <label>Birth</label>
    <input type="text" class="form-control" name="birth" placeholder="2020/03/21">
  </div>
</form>
处理请求
@PostMapping("/save")
public String save(Employee employee){
  employeeMapper.save(employee);
  // 添加完毕后应该返回首页,重定向url会变化,请求转发url不会变化
  return "redirect:/employee/list";
}
注意:提交时间格式的问题!如果我们把日期字段birth改为 2020-03-21,提交后会报400错误
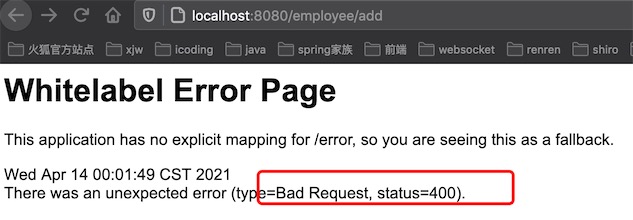
后端Spring会拒绝该值

我们打开WebMvcAutoConfiguration源码里它默认解析的时间日期格式是yyyy/MM/dd,所以我们要修改springmvc解析的日期格式
# 前端提交的日期格式问题,和前端提交的格式对应即可
spring.mvc.date-format=yyyy-MM-dd
修改员工
按钮
<td>
  <!--/* 编辑或者删除某个用户,这里是IDEA不识别,不是错误!*/-->
  <a th:href="@{/employee/} + ${emp.id}" type="button" class="btn btn-sm btn-primary">编辑</a>
  <a th:href="@{/employee/delete/} + ${emp.id}" type="button" class="btn btn-sm btn-danger">删除</a>
</td>
跳转到前端页面
// 跳转到员工修改页面
@GetMapping("/{id}")
public String toUpdateEmp(@PathVariable("id") Integer id,Model model){
  // 回显出用户的信息
  Employee employee = employeeMapper.get(id);
  model.addAttribute("employee",employee);
  // 应该要携带部门的数据信息
  List<Department> departments = departmentMapper.listDepartment();
  model.addAttribute("departments", departments);
  return "emp/update";
}
前端页面
<form th:action="@{/employee/update}" method="post">
  <input type="hidden" name="id" th:value="${employee.id}">
  <div class="form-group">
    <label>LastName</label>
    <input type="text" class="form-control" name="lastName" th:value="${employee.lastName}">
  </div>
  <div class="form-group">
    <label>Email</label>
    <input type="text" class="form-control" name="email" th:value="${employee.email}">
  </div>
  <div class="form-group">
    <label>Gender</label>
    <div class="form-inline">
      <div class="form-check form-check-inline">
        <input class="form-check-input" th:checked="${employee.gender==1}" type="radio" name="gender" id="gender1" value="1">
        <label class="form-check-label" for="gender1">男</label>
      </div>
      <div class="form-check form-check-inline">
        <input class="form-check-input" th:checked="${employee.gender==0}" type="radio" name="gender" id="gender2" value="0">
        <label class="form-check-label" for="gender1">女</label>
      </div>
    </div>
  </div>
  <div class="form-group">
    <label>Department</label>
    <select class="form-control" name="department">
      <option th:each="department:${departmentList}"
              th:text="${department.departmentName}"
              th:value="${department.id}"
              th:selected="${employee.department == department.id}">
      </option>
    </select>
  </div>
  <div class="form-group">
    <label>Birth</label>
    <input type="text" class="form-control" name="birth" th:value="${#dates.format(employee.birth,'yyyy-MM-dd HH:mm:ss')}">
  </div>
  <div class="form-group">
    <button type="submit" class="btn btn-primary">修改</button>
  </div>
</form>
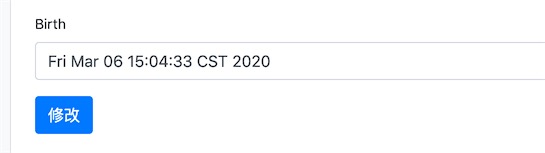
返回前端的日期格式不对,我们需要转换一下,依然使用Thymeleaf的工具对象#dates进行格式化显示
<input type="text" class="form-control" name="birth" th:value="${#dates.format(employee.birth,'yyyy-MM-dd HH:mm:ss')}">
处理请求
// 提交修改员工
@PostMapping("update")
public String update(Employee employee){
  employeeMapper.update(employee);
  return "redirect:/employee/list";
}
删除员工
前端处理
<a th:href="@{/employee/delete/} + ${emp.id}" type="button" class="btn btn-sm btn-danger">删除</a>
处理请求
// 提交删除
@GetMapping("/delete/{id}")
public String delete(@PathVariable("id") Integer id){
  employeeMapper.delete(id);
  return "redirect:/employee/list";
}
基本的错误处理方式
在template目录下建一个error文件夹,在里面放入对应的请求页面就可以了,
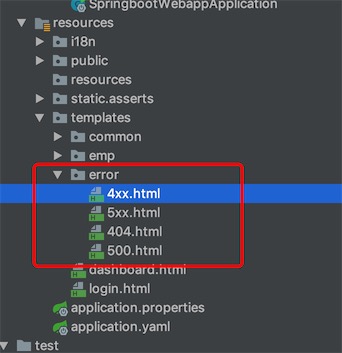
启动项目,随便访问一个连接,跳动404页面
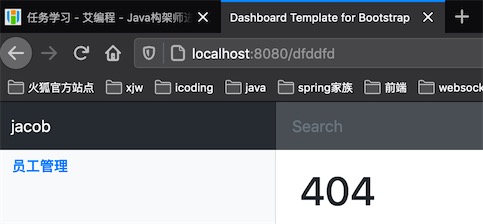
为什么错误会自动路由对应的页面?
错误处理的自动配置类ErrorMvcAutoConfiguration,里面注册了如下的bean
- DefaultErrorAttributes
- BasicErrorController
- ErrorPageCustomizer
- DefaultErrorViewResolver
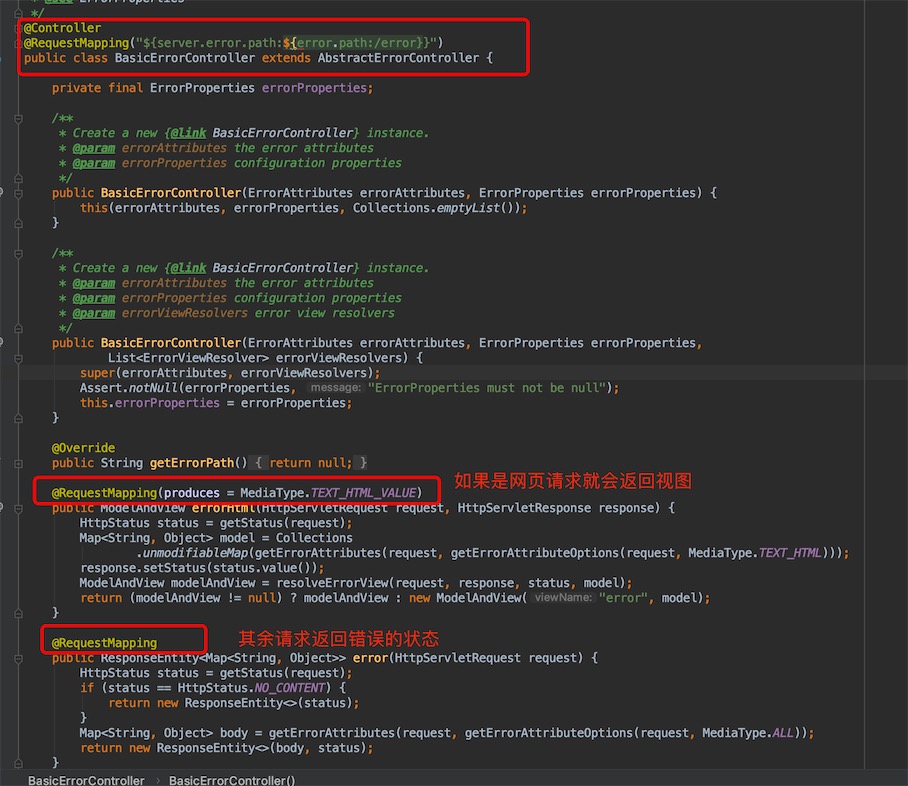
如果系统一旦出现了404、500错误,就会被ErrorPageCustomizer进行处理,就会跳转到/error请求进行处理。
这个请求被BasicErrorController处理,如果是网页端请求就会返回页面,如果是api调用就会返回JSON数据。
点进BasicErrorController源码
4、快速扒前端
以艾编程官网为例,打开网站后,f12打开开发者模式
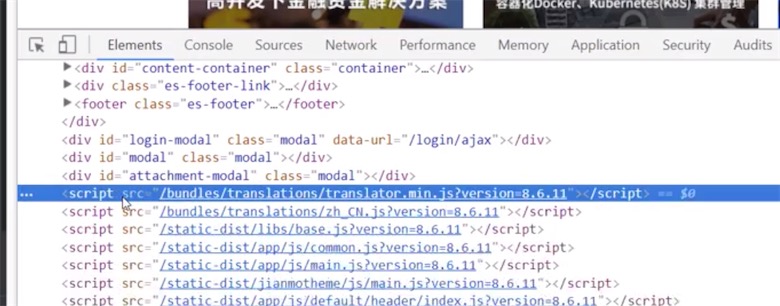
删除不必要的element元素,小技巧,删除后,网页不受影响的说明这个元素是不必要的,可以删除的。
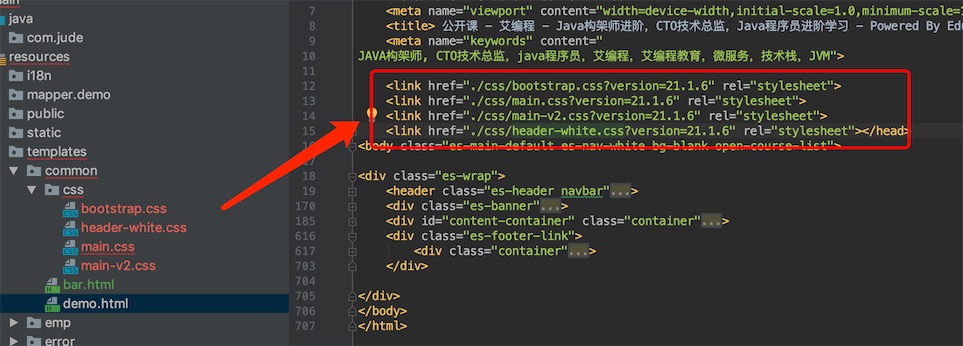
第二步,删除完元素后,右键复制->内部HTML,新建一个html页面,粘贴内容
第三步,下载对应的css样式文件,修改link路径
第四步,我们通过浏览器直接访问html页面
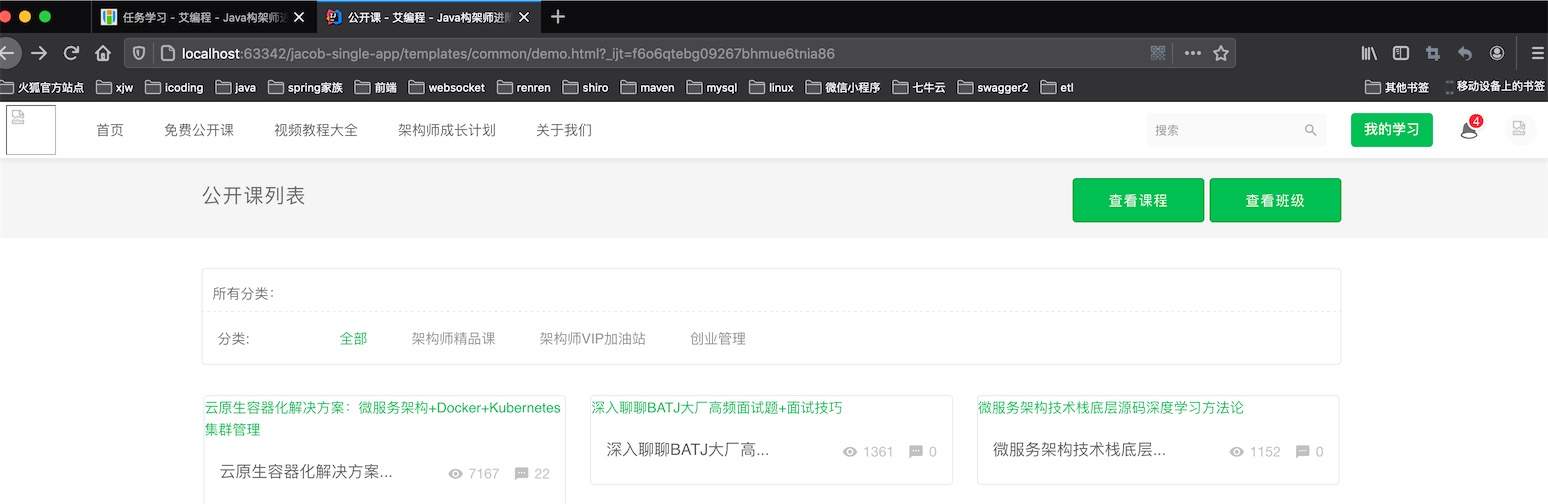
页面样式,基本存在,只是缺少了图片,接下来下载,修改图片路径
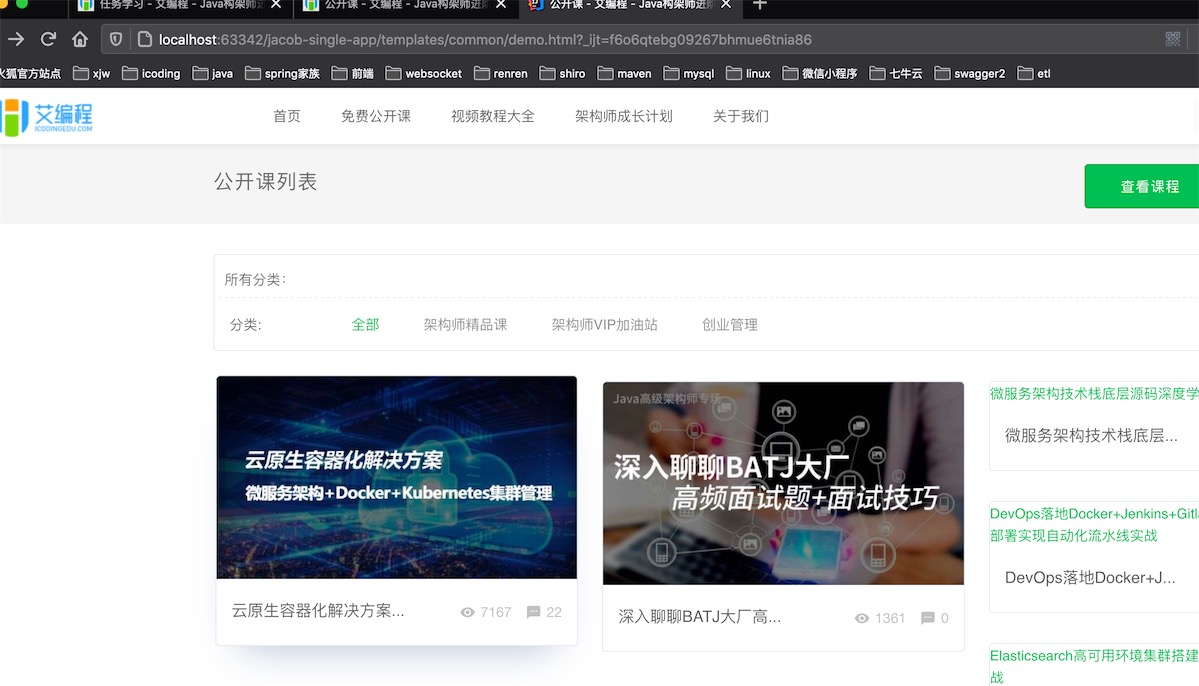
接下来就是对css样式的微调了,一个基本网站就是这么扒下来的
源码:https://gitee.com/jacobmj/study-demo/tree/master/jacob-single-app