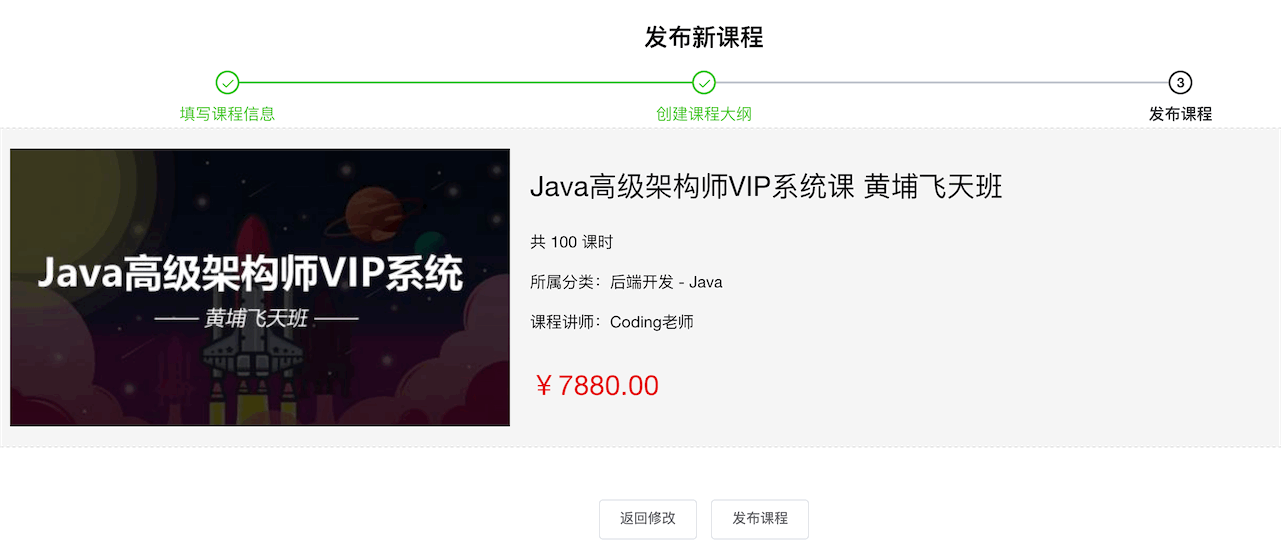
1、课程列表
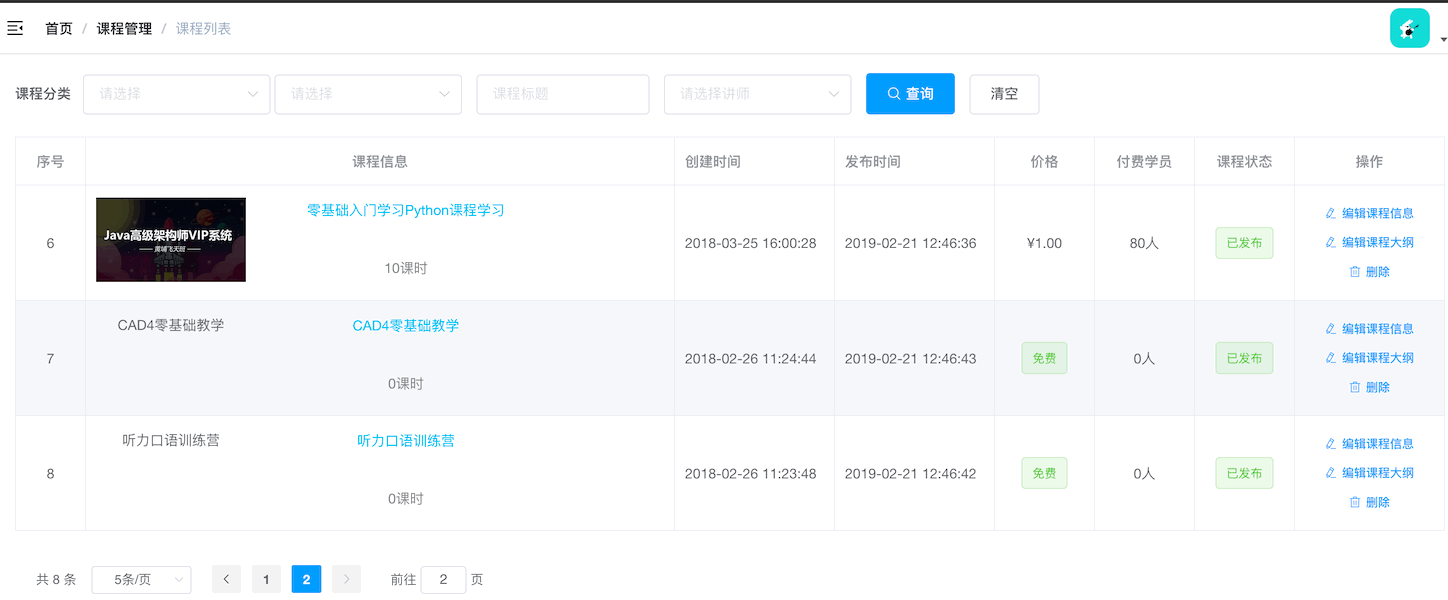
2、创建课程大纲
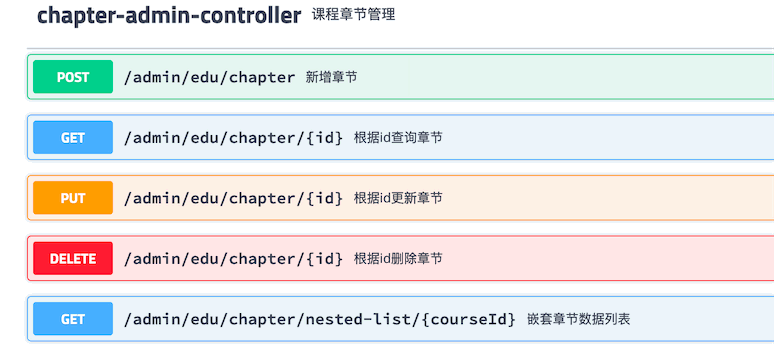
章节CRUD
1、后端业务编写
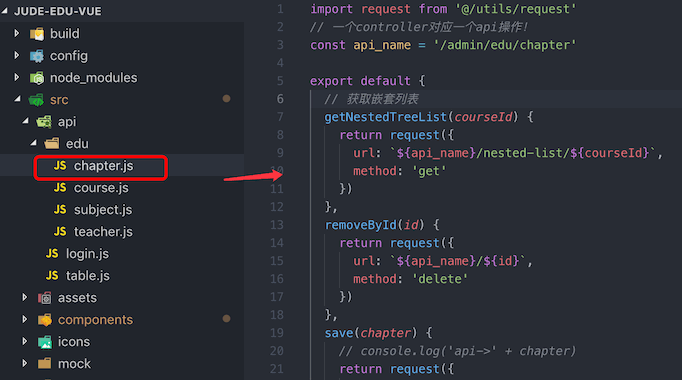
2、前端创建api.js
3、页面调用
-
编写组件ChapterList.vue
<template> <div> <div> <!-- 添加章节按钮 --> <el-button style="width:100%" @click="addOrUpdateHandle()">添加章节</el-button> </div> <!-- 章节列表 --> <ul class="chapterList"> <li v-for="chapter in chapterNestedList" :key="chapter.id"> <p> <span class="acts"> <el-button type="text">添加课时</el-button> <el-button type="text" @click="addOrUpdateHandle(chapter.id)">编辑</el-button> <el-button type="text" @click="removeChapter(chapter.id)">删除</el-button> </span> </p> <!-- 视频小节 --> <ul class="chapterList videoList"> <li v-for="video in chapter.children" :key="video.id"> <p></p> </li> </ul> </li> </ul> <!-- ref 应用 --> <!-- 自定义事件 refreshDataList 子组件调用--> <!-- vue事件 fetchData (this)组件调用--> <!-- 本质对于这个页面来说自己调用的自己方法(refreshDataList 调用 fetchData),架构思想:没有什么是加一层解决不了的! --> <chapter-form :courseId="courseId" ref="chapterForm" @refreshDataList="fetchData"></chapter-form> </div> </template> <script> import chapter from '@/api/edu/chapter' import ChapterForm from '@/views/edu/course/components/ChapterForm' export default { props:{ courseId: { type: String } }, components: {ChapterForm}, data() { return{ chapterNestedList: [] } }, created() { this.fetchData() }, methods: { fetchData() { chapter.getNestedTreeList(this.courseId).then( r => { this.chapterNestedList = r.data.items }) }, // 添加/修改章节 addOrUpdateHandle(chapterId){ this.$refs.chapterForm.init(chapterId) }, // 删除章节 removeChapter(chapterId) { this.$confirm('此操作将永久删除该章节, 是否继续?', '提示', { confirmButtonText: '确定', cancelButtonText: '取消', type: 'warning' }).then(() => { // 业务 return chapter.removeById(chapterId) }).then(() => { this.fetchData() this.$message({ type: 'success', message: '删除成功!' }) }).catch(() => { // 取消的逻辑 this.$message({ type: 'info', message: '已取消删除' }) }) } } } </script> -
注册到父容器中使用
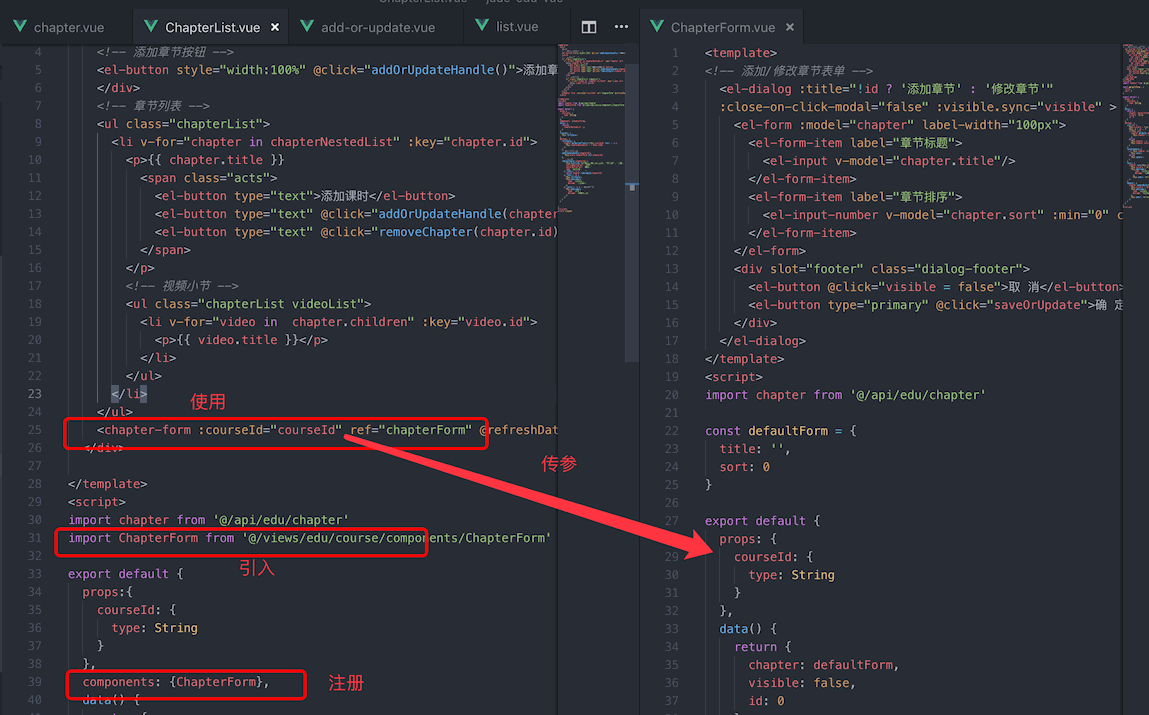
效果:
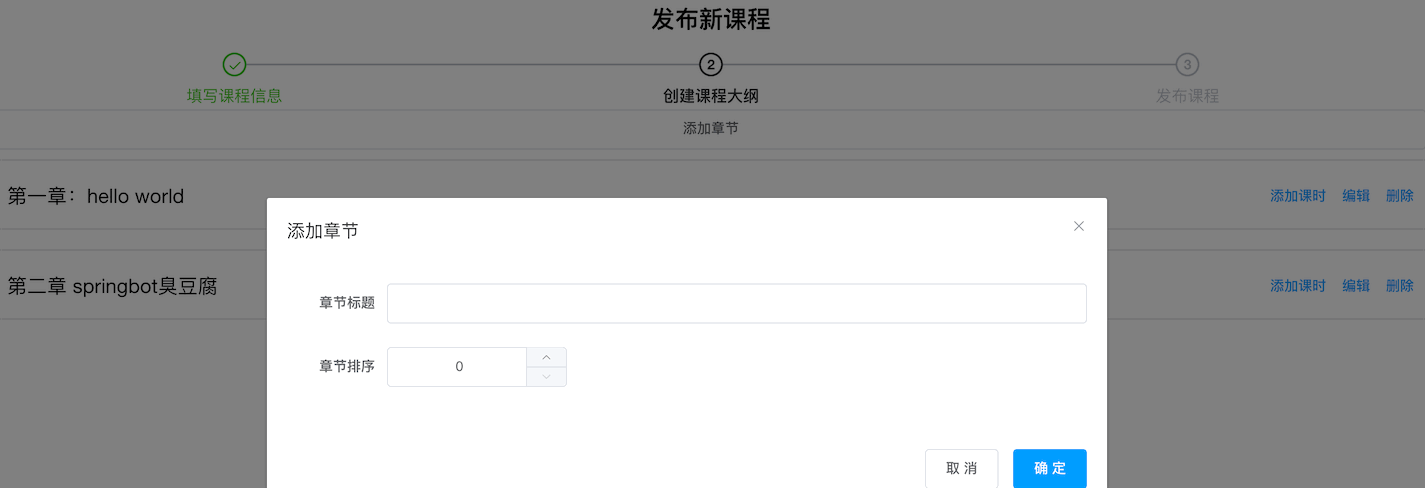
课时CRUD
后端API
1.1、定义课时视频表单对象
@ApiModel(value = "课时基本信息",description = "编辑课时基本信息的表单对象")
@Data
public class VideoInfoForm implements Serializable {
	private static final long serialVersionUID = 3120938703774172157L;

	@ApiModelProperty(value = "视频ID")
	private String id;

	@ApiModelProperty(value = "视频节点名称")
	private String title;

	@ApiModelProperty(value = "课程ID")
	private String courseId;

	@ApiModelProperty(value = "章节ID")
	private String chapterId;

	@ApiModelProperty(value = "视频资源")
	private String videoSourceId;

	@ApiModelProperty(value = "显示排序")
	private Integer sort;

	@ApiModelProperty(value = "是否免费")
	private Boolean free;
}
1.2、课时保存
1、业务层接口VideoService.java
void saveVideoInfo(VideoInfoForm videoInfoForm);
2、接口实现类 VideoServiceImpl.java
@Override
public void saveVideoInfo(VideoInfoForm videoInfoForm) {
  Video video = new Video();
  BeanUtils.copyProperties(videoInfoForm,video);
  this.save(video);
}
3、web层接口的定义VideoAdminController.java
@ApiOperation(value = "新增课时")
@PostMapping("save-video-info")
public R saveVideoInfo(@ApiParam(name="videoForm",value = "课时表单对象",required = true)
                       @RequestBody VideoInfoForm videoInfoForm){
  videoService.saveVideoInfo(videoInfoForm);

  return R.ok();
}
1.3、课时修改
1、业务层接口VideoService.java
VideoInfoForm getVideoInfoById(String id);

void updateVideoInfoById(VideoInfoForm videoInfoForm);
2、接口实现类 VideoServiceImpl.java
@Override
public VideoInfoForm getVideoInfoById(String id) {
  Video video = this.getById(id);
  VideoInfoForm videoInfoForm = new VideoInfoForm();
  BeanUtils.copyProperties(video,videoInfoForm);

  return videoInfoForm;
}

@Override
public void updateVideoInfoById(VideoInfoForm videoInfoForm) {
  Video video = new Video();
  BeanUtils.copyProperties(videoInfoForm,video);
  this.updateById(video);
}
3、web层接口的定义VideoAdminController.java
@ApiOperation(value = "根据ID查询课时")
@GetMapping("video-info/{id}")
public R getById(@ApiParam(name = "id",value = "课时id",required = true) @PathVariable String id){
  VideoInfoForm videoInfoForm = videoService.getVideoInfoById(id);

  return R.ok().data("item",videoInfoForm);
}

@ApiOperation(value = "更新课时")
@PutMapping("update-video-info/{id}")
public R updateVideoInfoById(@ApiParam(name = "id",value = "课时id",required = true) @PathVariable String id
                             ,@ApiParam(name="videoInfoForm",value = "课时基本信息",required = true) @RequestBody VideoInfoForm videoInfoForm){
  videoService.updateVideoInfoById(videoInfoForm);
  return R.ok();
}
1.4、课时删除
1、业务层接口VideoService.java
调用IService,mybatis-plus已封装的删除方法
2、接口实现类 VideoServiceImpl.java
调用IService,mybatis-plus已封装的删除方法
3、web层接口的定义VideoAdminController.java
@ApiOperation(value = "根据id删除课时节点")
@DeleteMapping("{id}")
public R deleteById(@ApiParam(name = "id",value = "课时id",required = true) @PathVariable String id){
  videoService.removeById(id);
  return R.ok();
}
前端页面组件
2.1、定义API:video.js
import request from '@/utils/request'

const api_name = '/admin/edu/video'

export default {
  // 保存课时信息
  save(videoInfo) {
    return request({
      url: `${api_name}/save-video-info`,
      method: 'post',
      data: videoInfo
    })
  },
  // 根据id查询课时
  getById(id) {
    return request({
      url: `${api_name}/video-info/${id}`,
      method:'get'
    })
  },
  // 更新课时信息
  update(videoInfo){
    return request({
      url: `${api_name}/update-video-info/${videoInfo.id}`,
      method: 'put',
      data: videoInfo
    })
  },
  // 删除课时
  removeById(id){
    return request({
      url: `${api_name}/${id}`,
      method: 'delete'
    })
  }
}
2.2、创建表单组件videoForm.vue
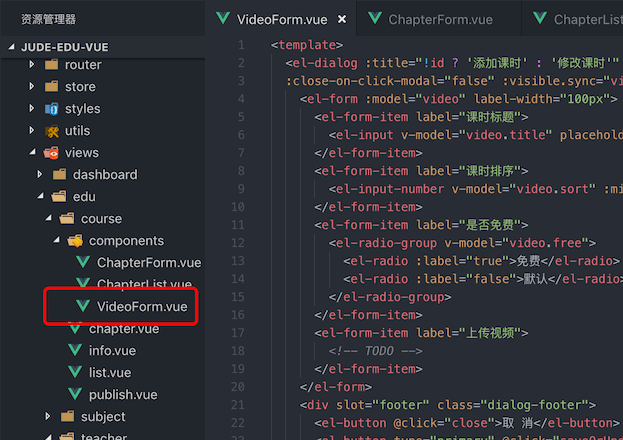
2.3、添加课时
ChapterList.vue引入课时表单组件
// 引入组件
import VideoForm from '@/views/edu/course/components/VideoForm'

export default {
  // 注册组件
   components: {ChapterForm,VideoForm},
ChapterList.vue使用组件
<template>
  <div>
    ....
     <video-form :courseId="courseId" ref="videoForm" @refreshDataList="fetchData"></video-form>
  </div>
</template>
”添加课时“按钮注册事件
<el-button type="text" @click="addOrUpdateVideoHandle(chapter.id)">添加课时</el-button>
定义方法
// 添加/修改课时
addOrUpdateVideoHandle(chapterId,videoId){
  this.$refs.videoForm.open(chapterId,videoId)
},
VideoForm.vue,定义open方法打开对话框,传递chapterId参数
open(chapterId,videoId) {
  this.visible = true
    this.id = videoId || 0
    if(this.id){
      video.getById(this.id).then(r => {
        this.video = r.data.item
      })
    }else{
      this.video = {...defaultForm}
      this.video.courseId = this.courseId
      this.video.chapterId = chapterId
    }
},
保存课时,VideoForm.vue中定义save方法
save() {
  video.save(this.video).then(r => {
    this.visible = false
    this.$message({
      type: 'success',
      message: '保存成功!'
    })
    // 调用父组件的方法,刷新章节课时列表
    this.$emit('refreshDataList')
  })
},
测试

2.4、修改课时
ChapterList.vue 显示课时列表
<!-- 视频小节 -->
<ul class="chapterList videoList">
  <li v-for="video in  chapter.children" :key="video.id">
    <p>
      <span class="acts">
        <el-tag v-if="video.free === true" size="mini" type="success">免费</el-tag>
        <el-button type="text" @click="addOrUpdateVideoHandle(chapter.id, video.id)">编辑</el-button>
        <el-button type="text" @click="removeVideo(video.id)">删除</el-button>
      </span>
    </p>
  </li>
</ul>
编辑打开对话框的open方法不用修改。
更新课时,VideoForm.vue中定义update方法
update() {
  chapter.update(this.chapter).then(r => {
    this.visible = false
      this.$message({
        type: 'success',
        message: '修改成功!'
      })
      // 调用父组件的方法
      this.$emit('refreshDataList')
  })
},
2.5、删除课时
ChapterList.vue 删除课时按钮
<el-button type="text" @click="removeVideo(video.id)">删除</el-button>
ChapterList.vue 定义删除方法
// 删除课时
removeVideo(id) {
  this.$confirm('此操作将永久删除该课时, 是否继续?', '提示', {
    confirmButtonText: '确定',
    cancelButtonText: '取消',
    type: 'warning'
  }).then(() => { // 业务
    return video.removeById(id)
  }).then(() => {
    this.fetchData()
    this.$message({
      type: 'success',
      message: '删除成功!'
    })
  }).catch(() => { // 取消的逻辑
    this.$message({
      type: 'info',
      message: '已取消删除'
    })
  })
}
3、发布课程
后端api
1.1、定义课程发布信息展示对象
@ApiModel(value = "课程发布信息确认")
@Data
public class CoursePublishVo implements Serializable {

	private static final long serialVersionUID = 7373347231248067328L;

	@ApiModelProperty(value = "课程标题")
	private String title;

	@ApiModelProperty(value = "课程封面")
	private String cover;

	@ApiModelProperty(value = "总课时")
	private Integer lessonNum;

	@ApiModelProperty(value = "课程专业一级分类")
	private String subjectLevelOne;

	@ApiModelProperty(value = "课程专业二级分类")
	private String subjectLevelTwo;

	@ApiModelProperty(value = "课程销售价格")
	private String price;
}
1.2、根据id获取课程发布信息
数据层接口 CourseMapper.java
CoursePublishVo getCoursePublishVoById(String id);
实现 CourseMapper.xml
<!--mp没有的方法,我们自己新增即可-->
<select id="getCoursePublishVoById" resultType="com.jude.edu.vo.CoursePublishVo">
SELECT
c.title,
c.cover,
c.lesson_num AS lessonNum,
CONVERT(c.price, DECIMAL(8,2)) AS price,
s1.title AS subjectLevelOne,
s2.title AS subjectLevelTwo,
t.name AS teacherName
FROM
edu_course c
LEFT JOIN edu_teacher t ON c.teacher_id = t.id
LEFT JOIN edu_subject s1 ON c.subject_parent_id = s1.id
LEFT JOIN edu_subject s2 ON c.subject_id = s2.id
WHERE
c.id = #{id}
</select>
1、业务层接口 CourseService.java
// 查询课程发布确认信息
CoursePublishVo getCoursePublishVoById(String id);
2、接口实现类 CourseServiceImpl.java
@Override
public CoursePublishVo getCoursePublishVoById(String id) {
CoursePublishVo coursePublishVo = baseMapper.getCoursePublishVoById(id);
  return coursePublishVo;
}
3、web层接口的定义 CourseAdminController.java
@ApiOperation(value = "根据ID获取课程发布信息")
@GetMapping("course-publish-info/{id}")
public R getCoursePublishInfoById(@ApiParam(name = "id",value = "课程id",required = true) @PathVariable String id){
  CoursePublishVo coursePublishVo = courseService.getCoursePublishVoById(id);

  return R.ok().data("item",coursePublishVo);
}
1.3、根据id发布课程
1、业务层接口 CourseService.java
void publishCourseById(String id);
2、接口实现类 CourseServiceImpl.java
@Override
public void publishCourseById(String id) {
  Course course = new Course();
  course.setId(id);
  course.setStatus(Course.COURSE_NORMAL);
  this.updateById(course);
}
3、web层接口的定义 CourseAdminController.java
@ApiOperation(value = "根据id发布课程")
@PutMapping("publish-course/{id}")
public R publishCourseById(
  @ApiParam(name = "id", value = "课程ID", required = true)
  @PathVariable String id){
  // 发布
  courseService.publishCourseById(id);
  return R.ok();
}
前端页面组件
2.1、course.js增加远程方法
// 获取课程发布信息
getCoursePublishInfoById(id) {
  return request({
    url: `${api_name}/course-publish-info/${id}`,
    method: 'get'
  })
},
  // 发布课程
  publishCourse(id) {
    return request({
      url: `${api_name}/publish-course/${id}`,
      method: 'put'
    })
  }
2.2、publish.vue 定义方法
import course from '@/api/edu/course'

methods: {
  	fetchData() {
      course.getCoursePublishInfoById(this.courseId).then(r => {
        this.coursePublish = r.data.item
      })
    },
    publish() {
      course.publishCourse(this.courseId).then((r) => {
         // 最终发布成功跳转会列表页面
        this.$router.push({path: '/edu/course/list'})
        this.active = 3
      })
    }
}
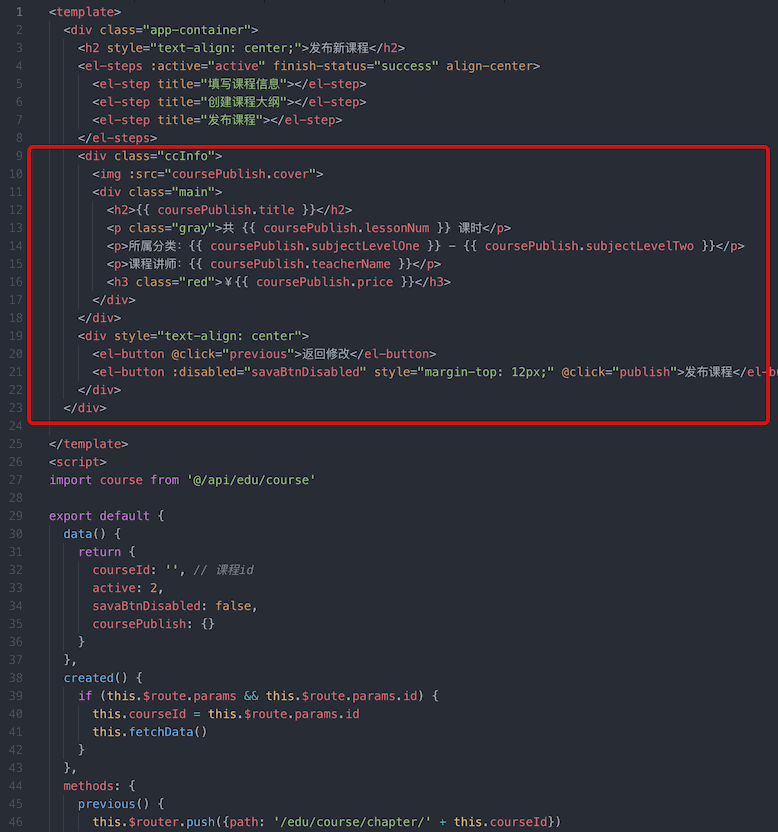
2.3、模板
测试页面
