1、CRUD命令操作文档
以下命令都是在kibana中执行,也可以选择postman
创建数据PUT
PUT /index_customer/_doc/1001
{
    "id": 1001,
    "age": 24,
    "username": "kingliu",
    "nickname": "飞上天空做太阳",
    "consume": 1289.88,
    "desc": "我在艾编程学习java和vue,学习到了很多知识",
    "sex": 1,
    "birthday": "1996-12-24",
    "faceimg": "https://www.icodingedu.com/img/customers/1001/logo.png",
    "tags": ["技术","直男"]
}
PUT /index_customer/_doc/1002
{
    "id": 1002,
    "age": 26,
    "username": "lucywang",
    "nickname": "夜空中最亮的星",
    "consume": 6699.88,
    "desc": "我在艾编程学习VIP课程,非常打动我",
    "sex": 0,
    "birthday": "1994-02-24",
    "faceimg": "https://www.icodingedu.com/img/customers/1002/logo.png",
    "tags": ["技术","温暖"]
}
PUT /index_customer/_doc/1003
{
    "id": 1003,
    "age": 30,
    "username": "kkstar",
    "nickname": "照亮你的星",
    "consume": 7799.66,
    "desc": "老师们授课风格不同,但结果却是异曲同工,讲的很不错,值得推荐",
    "sex": 1,
    "birthday": "1990-12-02",
    "faceimg": "https://www.icodingedu.com/img/customers/1003/logo.png",
    "tags": ["技术","交友"]
}
PUT /index_customer/_doc/1004
{
    "id": 1004,
    "age": 31,
    "username": "alexwang",
    "nickname": "骑着老虎看日出",
    "consume": 9799.66,
    "desc": "课程内容充实,有料,很有吸引力,赞一个",
    "sex": 1,
    "birthday": "1989-05-09",
    "faceimg": "https://www.icodingedu.com/img/customers/1004/logo.png",
    "tags": ["技术","直男"]
}
GET /index_customer/_doc/1002
# 返回
{
  "_index" : "index_customer",   // 索引 (数据库)
  "_type" : "_doc",		// 类型(表)
  "_id" : "1002",			// 文档ID  (表中的记录 row)
  "_version" : 1,  // 版本,每次修改就会+1
  "_seq_no" : 2,
  "_primary_term" : 5,
  "found" : true,		// 是否查询到
  "_source" : {			// 查询出来的数据
    "id" : 1002,
    "age" : 26,
    "username" : "lucywang",
    "nickname" : "夜空中最亮的星",
    "consume" : 6699.88,
    "desc" : "我在艾编程学习VIP课程,非常打动我",
    "sex" : 0,
    "birthday" : "1994-02-24",
    "faceimg" : "https://www.icodingedu.com/img/customers/1002/logo.png",
    "tags" : [
      "技术",
      "温暖"
    ]
  }
}
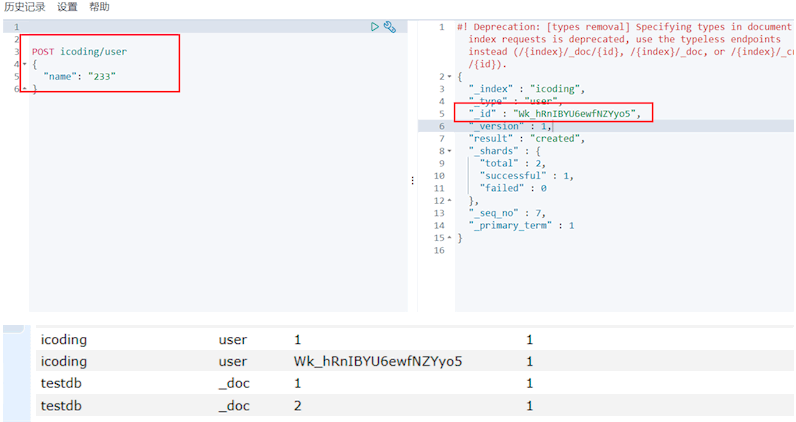
创建不指定id的情况下,会随机生成id,需要使用post方式创建
更新数据POST

# 去掉type(_doc)
POST /index_customer/_update/1002
{
  "doc": {
    "age": 24,
    "desc": "我在艾编程学习VIP课程,非常打动我,努力学习,升职加薪!"
  }
}
查询数据
简单查询QueryString
# 根据id
GET /index_customer/_doc/1002

# 简单的条件
# 格式:Get index/type/_search?q=参数
GET /index_customer/_doc/_search?q=desc:艾编程
# 可以去掉type
GET /index_customer/_search?q=desc:艾编程

_score,分数,匹配度
复杂查询DSL
1、match 条件查询
GET /index_customer/_search
{
  "query": {
    "match": {
      "username": "lucywang"
    }
  }
}
2、match_all 所有数据
GET /index_customer/_search
{
  "query": {
    "match_all": {}
  }
}

# 指定返回字段 _source
GET /index_customer/_search
{
  "query": {
    "match_all": {}
  },
  "_source": ["username","desc"]
}
3、sort 排序
# 尽量按照规则排序:数字、日期、id
GET /index_customer/_search
{
  "query": {
    "match_all": {}
  },
  "sort": [
    {
      "age": {
        "order": "desc"
      }
    }
  ]
}
4、from size 分页
GET /index_customer/_search
{
  "query": {
    "match_all": {}
  },
  "sort": [
    {
      "age": {
        "order": "desc"
      }
    }
  ],
  "from": 3,  # 从第几条数据开始展示
  "size": 2   # 返回的数据数量
}
发现:ES的所有查询条件都是可拔插的,是分割的
5、bool 布尔查询
- must:查询必须匹配所有搜索条件,类似and
- should:查询只要匹配一个搜索条件即可,类似or
- must_not:不匹配搜索条件的内容,一个都不要满足,类似not
这里要注意的点
# must、should、must_not虽然语法可以并列
# must和should同时写,只有must生效
# must和must_not同时写,会在must符合后进行must_not条件剔除
# 查询username是lucy,并且年龄是3
GET /index_customer/_search
{
  "query": {
    "bool": {
      "must": [
        {
          "match": {
            "username": "lucy"
          }
        },
        {
          "match": {
            "age": 3
          }
        }
      ]
    }
  }
}

# 查询username=lucy,age 在18到30之间的(gt、get大于等于、lt、lte小于等于)
GET /index_customer/_search
{
  "query": {
    "bool": {
      "must": [
        {
          "match": {
            "username": "lucy"
          }
        }
      ],
      "filter": {
        "range": {
          "FIELD": {
            "gte": 18,
            "lte": 30
          }
        }
      }
    }
  }
}
6、检索标签
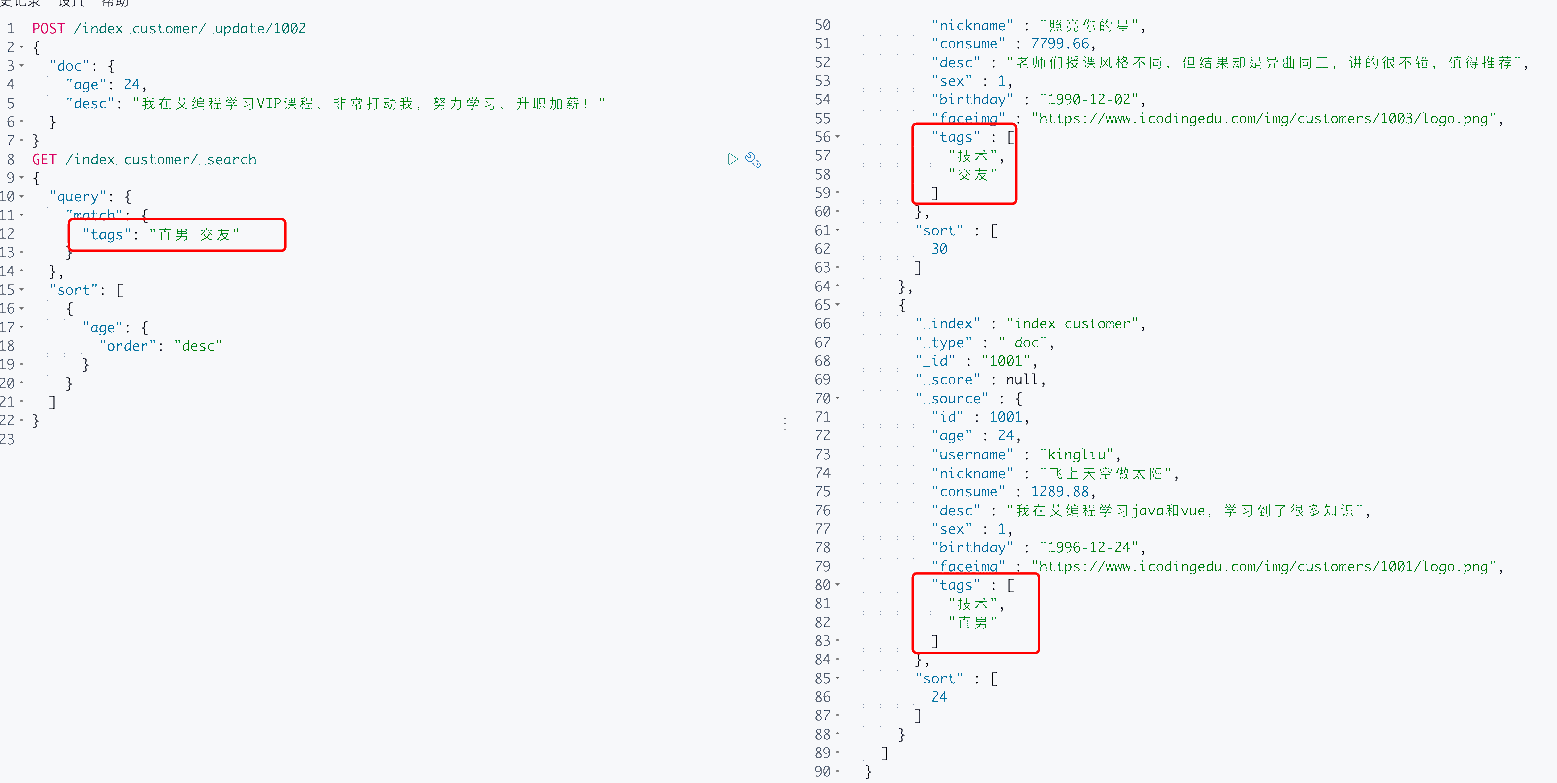
和正常查询一样,tags是数组,查询多个用空格分割即可
7、term 精确查询(不分词)
match会经过分词,而term不经过分词
在创建index 索引的时候,有个mappings的配置,用来定义字段类型,也可以指定字段使用的分词器,
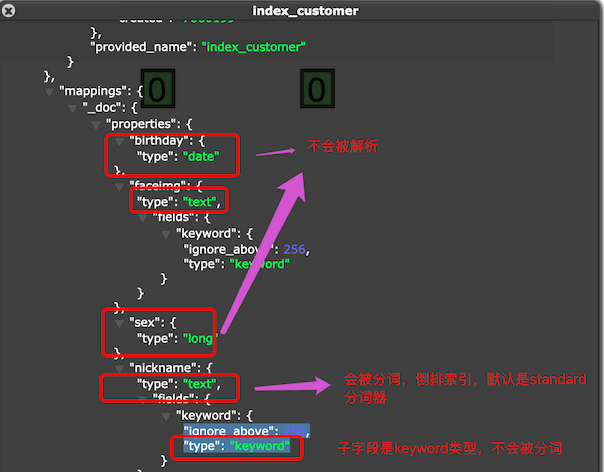
字段type 的10种类型
- text 文字类型,内容需要被分词被倒排索引
- keyword 文字类型,不会被分词,精确匹配,比如qq号,微信号
- long,integer,short,byte
- double,float
- boolean
- date
POST /index_customer/_mapping
{
    "properties": {
        "id": {
            "type": "long"
        },
        "age": {
            "type": "integer"
        },
        "username": {
            "type": "keyword"  # 不会被分词,精确匹配
        },
        "nickname": {
            "type": "text",
            "analyzer": "ik_max_word"  # 指定分词器
        },
        "faceimg": {
            "type": "text",
            "index": false
        }
    }
}
term查询就相当于keyword 类型的字段一样精确匹配,不会被分词
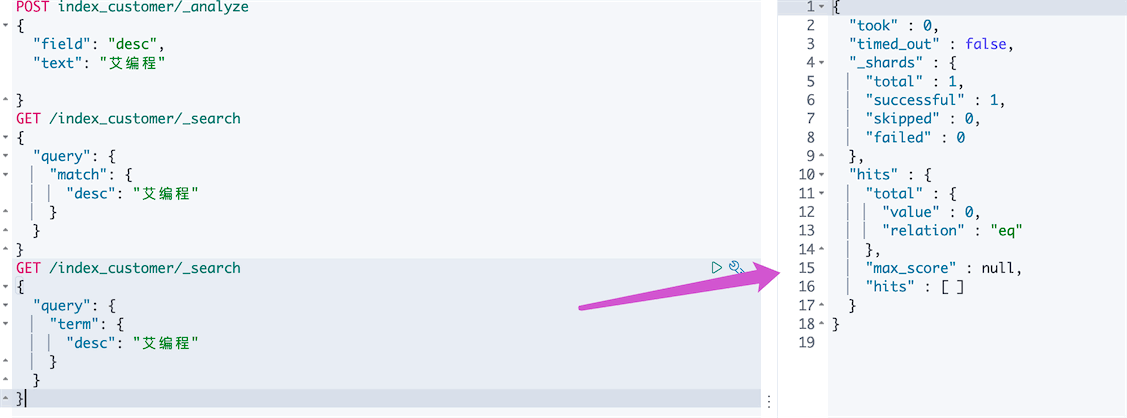
使用term精确匹配desc=“艾编程”,一个查询结果也没有
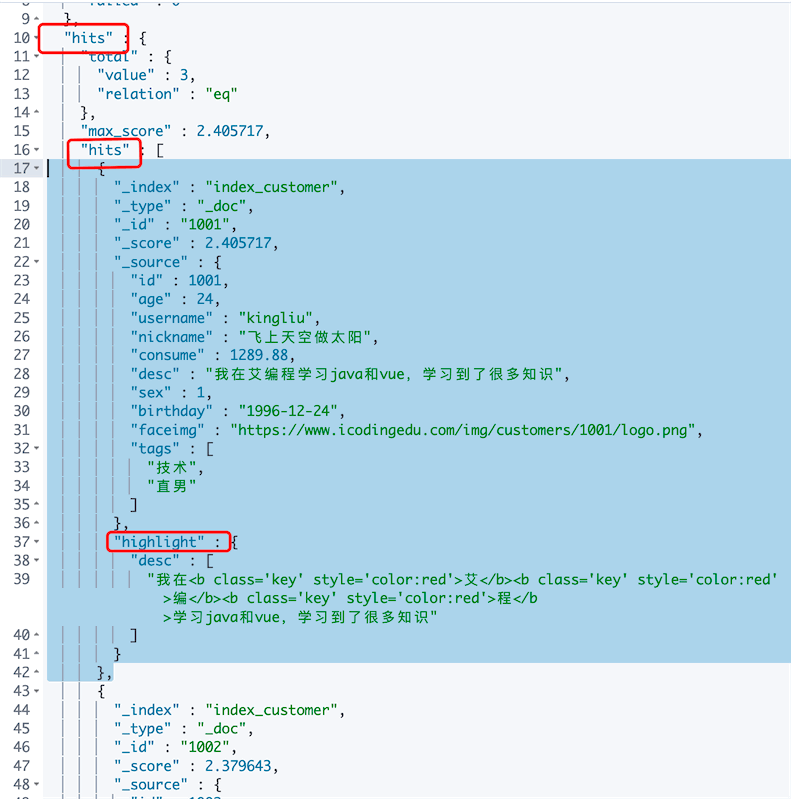
8、highlight 结果高亮

搜索的关键字会被em包裹,html代码定义em的样式 style=”color:red”实现高亮红色
自定义前缀后缀,指定class
GET /index_customer/_search
{
  "query": {
    "match": {
      "desc": "艾编程"
    }
  },
  "highlight": {
    "pre_tags": "<b class='key' style='color:red'>",
    "post_tags": "</b>",
    "fields": {
      "desc": {}
    }
  }
}
2、SpringBoot集成ElasticSearch
ES客户端
官网:https://www.elastic.co/guide/index.html
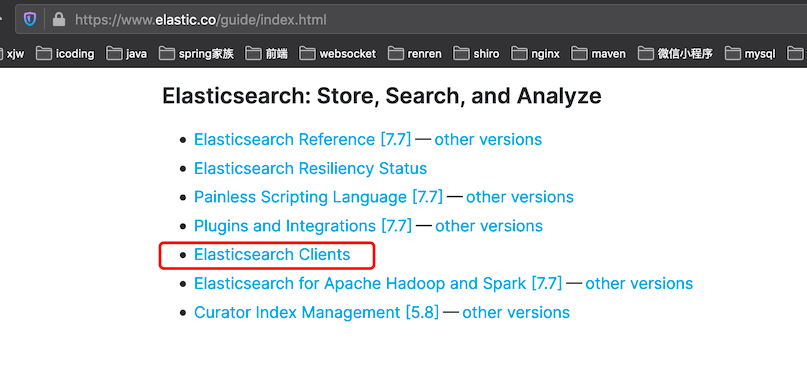
点击ElasticSearch Clients
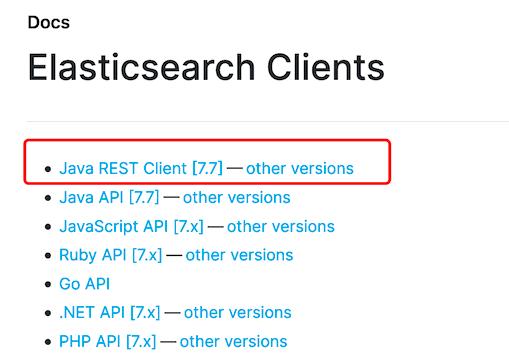
我们使用Java Rest client,点进去
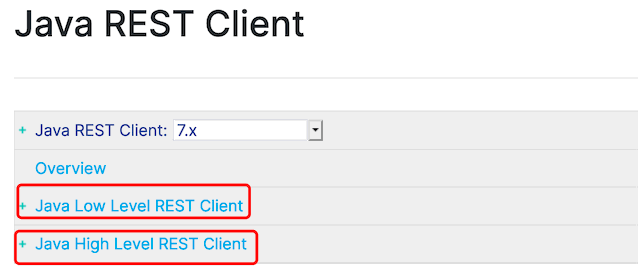
发现高低两个版本
- Low level,接近原生,使用httpclient 发送请求
- High level,封装了低版本的操作,更加简单
使用Java high level rest client
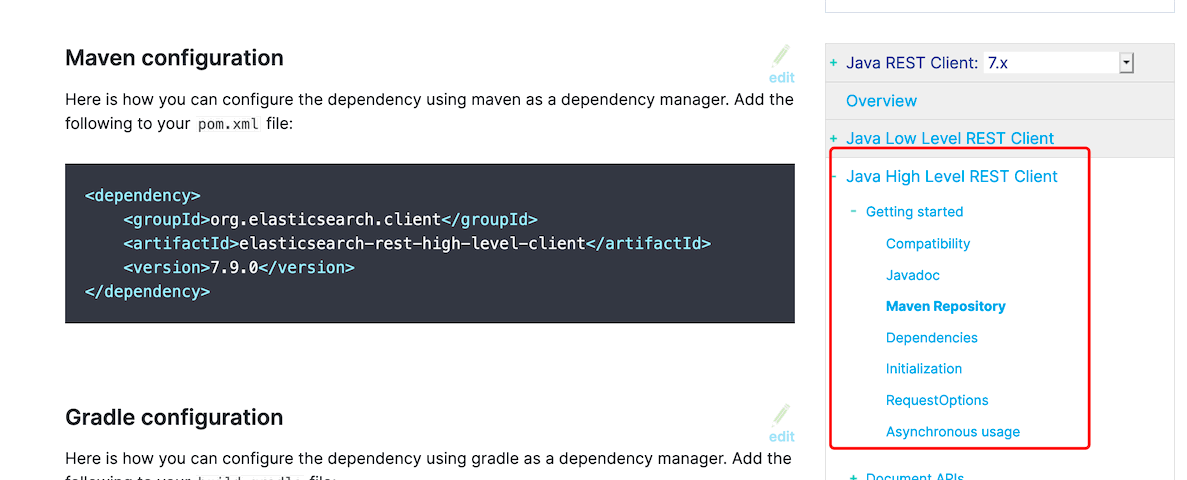
依赖
<dependency>
    <groupId>org.elasticsearch.client</groupId>
    <artifactId>elasticsearch-rest-high-level-client</artifactId>
    <version>7.9.0</version>
</dependency>
version要对应ES的版本
对象初始化构建
// 客户端连接ES的实例节点
RestHighLevelClient client = new RestHighLevelClient(
        RestClient.builder(
                new HttpHost("localhost", 9200, "http"),
                new HttpHost("localhost", 9201, "http")));
Api测试
使用ElasticSearchRestTemplate
原来spring-boot-starter-data-elasticsearch连接ES主要使用ElasticsearchTemplate进行操作
springboot 2.2.x 中都可以使用ElasticsearchTemplate 和 ElasticsearchRestTemplate
springboot 2.3.x 后建议使用ElasticsearchRestTemplate
1、创建一个springboot项目,导入依赖
<dependency>
  <groupId>org.springframework.boot</groupId>
  <artifactId>spring-boot-starter-data-elasticsearch</artifactId>
</dependency>
注意:SpringBoot维护的ES版本要和自己使用的ES版本一致,我使用的是7.6.1版本
SpringBoot2.2.x版本才支持ElasticSearch7.x
SpringBoot 2.3.0 维护的ES版本是7.6.2

指定ES的版本
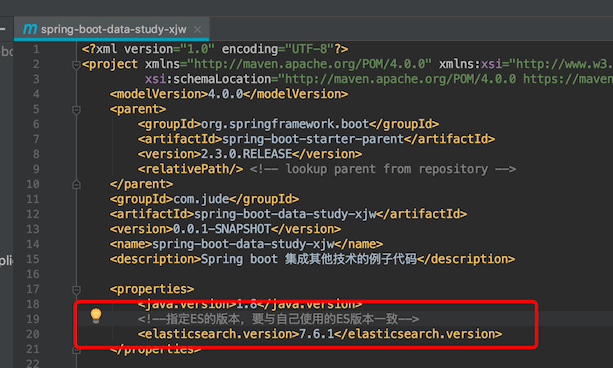
2、简单分析一波源码
全局搜索ElasticsearchDataAutoConfiguration,这个就是springboot ES的自动配置类

先配置ElasticsearchRestClientAutoConfiguration,点进去看源码

Application.yml启用配置文件类是ElasticsearchRestClientProperties,
-
第一个配置的是RestClientBuilderConfiguration,它的作用是建立ES的连接
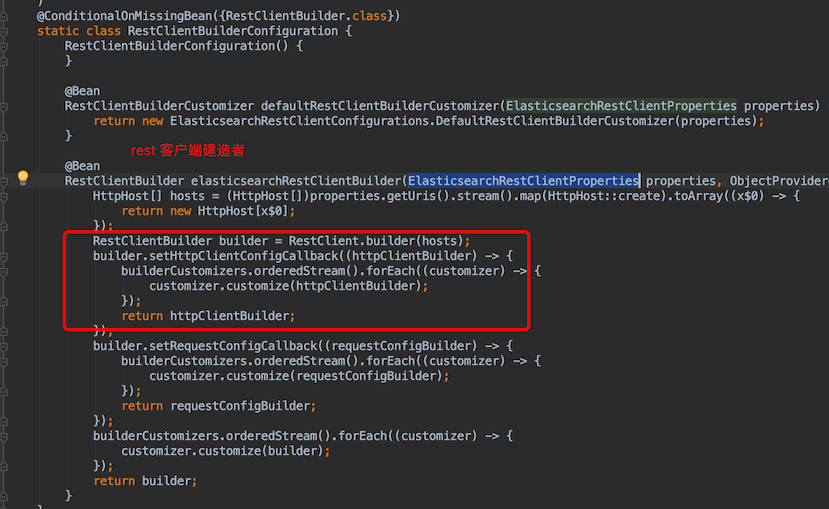
-
第二个配置的是RestHighLevelClientConfiguration,使用上面的RestClientBuilder注入ES的高版本client和低版本Client两个bean
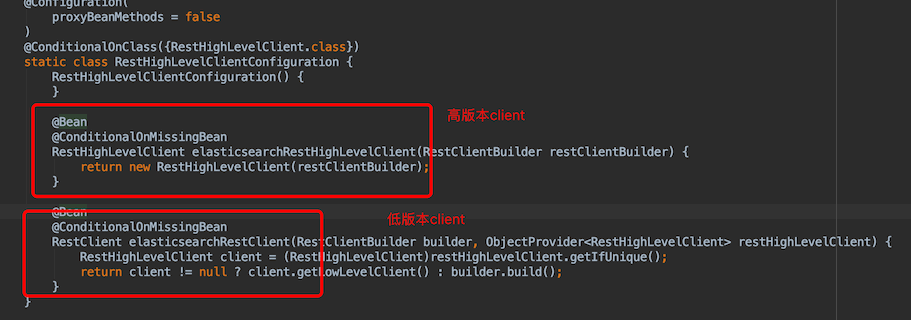
回到ElasticsearchDataAutoConfiguration,它引入的配置类RestClientConfiguration,点击源码,它注入容器的ElasticsearchRestTemplate 的bean依赖的是RestHighLevelClient的bean

所以ElasticsearchRestTemplate 的bean 依赖关系是这样的:
elasticsearchRestTemplate -> restHighLevelClient -> restClient->restClientBuilder
配置ES连接
spring:
  elasticsearch:
    rest:
      uris: localhost:9200 # 默认其实就是localhost:9200,配置成自己ES节点
ES升级到7.16.x版本后,使用restHighLevelClient 做_search请求
SearchResponse searchResponse = restHighLevelClient.search(searchRequest, RequestOptions.DEFAULT);
请求会打印warning日志
[ignore_throttled] parameter is deprecated because frozen indices have been deprecated
意思就是我们的请求不能带有deprecated不赞成的请求参数
pom.xml依赖修改ES版本刷新

ES 7.15版本开始,弃用restHighLevelClient,改用java api client

看官网 :https://www.elastic.co/guide/en/elasticsearch/client/java-api-client/current/migrate-hlrc.html
// Create the low-level client
RestClient httpClient = RestClient.builder(
    new HttpHost("localhost", 9200)
).build();

// Create the HLRC
RestHighLevelClient hlrc = new RestHighLevelClientBuilder(httpClient)
    .setApiCompatibilityMode(true)
    .build();

// Create the Java API Client with the same low level client
ElasticsearchTransport transport = new RestClientTransport(
    httpClient,
    new JacksonJsonpMapper()
);

ElasticsearchClient esClient = new ElasticsearchClient(transport);

// hlrc and esClient share the same httpClient
建议我们使用ElasticsearchClient 替换 RestHighLevelClient;
3、测试客户端的Api操作
索引操作
@SpringBootTest
public class ElasticSearchApiTest {
	@Autowired
	private RestHighLevelClient restHighLevelClient;

	// 创建索引
	@Test
	public void testCreateIndex() throws IOException {
		// 1. 创建一个请求 (相当于 PUT jude_index)
		CreateIndexRequest request = new CreateIndexRequest("jude_index");

		// 2. 通过java客户端来发送这个请求,会获得一个响应结果
		CreateIndexResponse response = restHighLevelClient.indices().create(request, RequestOptions.DEFAULT);
		System.out.println(response);
	}

  // 获得索引
	@Test
	void testExistsIndex() throws IOException {
		// 1、封装请求
		GetIndexRequest request = new GetIndexRequest("jude_index");
		// 2、发送请求
		boolean exists = restHighLevelClient.indices().exists(request, RequestOptions.DEFAULT);
		// 结果
		System.out.println(exists);
	}

  // 删除索引
	@Test
	void testDeleteIndex() throws IOException {
		DeleteIndexRequest request = new DeleteIndexRequest("jude_index");
		AcknowledgedResponse delete = restHighLevelClient.indices().delete(request, RequestOptions.DEFAULT);
		System.out.println(delete);
	}

}
文档操作
1、插入文档
// 创建文档
	@Test
	void testAddDocument() throws IOException {
		// 1、创建请求
		IndexRequest request = new IndexRequest("index_customer");
		// 2、创建对象
		Customer customer = new Customer();
		customer.setId("1005");
		customer.setAge(32);
		customer.setUsername("jude");
		customer.setNickname("我是你的神话");
		customer.setConsume(6999.99F);
		customer.setDesc("需要抽时间把所有内容都学个遍,太给力料");
		customer.setSex(1);
		customer.setBirthday("1988-07-19");
		customer.setFaceimg("https://www.icodingedu.com/img/customers/1005/logo.png");

		// 3、构建请求
		request.id("1005");
		request.timeout(TimeValue.timeValueSeconds(10));
		// 设置参数
		request.source(JSON.toJSONString(customer), XContentType.JSON);

		// 4、发送请求
		IndexResponse response = restHighLevelClient.index(request,RequestOptions.DEFAULT);
		System.out.println(response.toString());
		RestStatus status = response.status();
		System.out.println(RestStatus.OK==status|| RestStatus.CREATED == status);

	}
启动测试,查看ES head

创建文档成功。
2、批量添加文档
// 批量添加文档
@Test
void testBulkRequest() throws IOException {
  BulkRequest request = new BulkRequest();
  request.timeout("2m");

  // 从数据库查询
  ArrayList<Customer> userList = new ArrayList<>();
  userList.add(new Customer("1006",12,"test","好甜的棉花糖",10789.86F,"还不错,内容超过我的预期值,钱花的值",0,"1993-10-11","1"));
  userList.add(new Customer("1007",13,"test2","船长jack",10789.86F,"还不错,内容超过我的预期值,钱花的值",0,"1993-10-11","1"));
  userList.add(new Customer("1008",14,"test4","我爱篮球",10789.86F,"还不错,内容超过我的预期值,钱花的值",0,"1993-10-11","1"));

  for (int i = 0; i < userList.size() ; i++) {
    request.add(
      new IndexRequest("index_customer")
      .id(userList.get(i).getId())
      .source(JSON.toJSONString(userList.get(i)),XContentType.JSON)
    );
  }

  BulkResponse response = restHighLevelClient.bulk(request, RequestOptions.DEFAULT);
  System.out.println(!response.hasFailures());
}
3、查询文档是否存在
@Test
void testIsExists() throws IOException {
  GetRequest request = new GetRequest("index_customer", "1005");
  // 过滤结果 _source
  // 不获取上下文 DO_NOT_FETCH_SOURCE
  request.fetchSourceContext(new FetchSourceContext(false));
  request.storedFields("_none_");

  boolean exists = restHighLevelClient.exists(request,RequestOptions.DEFAULT);
  System.out.println(exists);
}
4、根据id查询文档
@Test
void testGetDocument() throws IOException {
  GetRequest request = new GetRequest("index_customer","1005");
  GetResponse response = restHighLevelClient.get(request, RequestOptions.DEFAULT);
  System.out.println(response.toString());
  System.out.println(response.getSourceAsMap()); // 查询成功
}
5、更新文档
@Test
void testUpdateDocument() throws IOException {
  // 1、创建请求
  UpdateRequest request = new UpdateRequest("index_customer","1005");
  request.timeout("10s");

  // 创建更新对象,设置到 doc 中!
  Customer customer = new Customer();
  customer.setNickname("我爱编程");
  request.doc(JSON.toJSONString(customer), XContentType.JSON);

  // 2、发送请求
  UpdateResponse response = restHighLevelClient.update(request, RequestOptions.DEFAULT);
  System.out.println(response.status()==RestStatus.OK);
}
启动,查看ES head,修改成功

6、删除文档
@Test
void testDeleteDocument() throws IOException {
  DeleteRequest request = new DeleteRequest("index_customer", "1005");
  request.timeout("1s");
  DeleteResponse response = restHighLevelClient.delete(request, RequestOptions.DEFAULT);
  System.out.println(response.status()==RestStatus.OK);
}
通过查询删除条件
    @Override
    public void deleteTodo(List<TodoEntity> dataList, String indexName) throws IOException {
        DeleteByQueryRequest deleteRequest = new DeleteByQueryRequest(indexName);
        // 查询条件
        String modelId = dataList.get(0).getModelId();
        List<String> targets = dataList.stream().map(TodoEntity::getTarget).collect(Collectors.toList());
        BoolQueryBuilder boolQuery = QueryBuilders.boolQuery().must(QueryBuilders.termQuery("modelId",modelId))
                .must(QueryBuilders.termsQuery("target",targets));
        deleteRequest.setQuery(boolQuery);
        BulkByScrollResponse bulkByScrollResponse = restHighLevelClient.deleteByQuery(deleteRequest, RequestOptions.DEFAULT);
        log.info("执行结果:{}",bulkByScrollResponse.getStatus());
    }
执行时报错

查询原因发现,因为通过索引生命周期管理,索引已触发滚动进入warm阶段,在该阶段索引是只读的,没有write权限,具体可看

查询对象
@Test
void testSearch() throws IOException {
  // 创建请求
  SearchRequest request = new SearchRequest("index_customer");
  // 1、构建查询对象
  SearchSourceBuilder searchSourceBuilder = new SearchSourceBuilder();
  searchSourceBuilder.timeout(new TimeValue(60, TimeUnit.SECONDS));
  // termQuery
  // matchAll
  // match
  // bool
  // ....
  // 编写规则(完全匹配)
  //  MatchAllQueryBuilder matchAllQueryBuilder = QueryBuilders.termQuery("name","qinjiang");
  // 2、查询条件设置
  MatchQueryBuilder matchQueryBuilder = QueryBuilders.matchQuery("desc","艾编程");


  // 3、查询条件放入SearchSourceBuilder
  searchSourceBuilder.query(matchQueryBuilder);

  // 发送请求
  request.source(searchSourceBuilder);

  SearchResponse response = restHighLevelClient.search(request, RequestOptions.DEFAULT);
  // 4、获取查询结果
  System.out.println(response.getHits().toString());
  System.out.println("========================================");
  for (SearchHit hit : response.getHits().getHits()) {
    System.out.println(hit.getSourceAsMap());
  }
}
启动测试

小结:
所有的java操作都是客户端操作演变过来的,只需要掌握原生Api,学习其他包装类就很快了