 弹吉他的兔子
mongodb作为非关系型数据库的主流之一,还是有学习的必要,redis也是非关系数据库的一种
1、简介
MongoDB是一个基于分布式文件存储的数据库。由C++语言编写,旨在为WEB应用提供可扩展的高性能数据存储解决方案。MongoDB是一个介于关系型数据库和非关系型数据库之间的产品,是非关系型数据库当中功能最丰富,最像关系型数据库的。
特点
-
索引
mongodb文档的任何字段都可以建立索引
-
复制
mongodb提供副本集的高可用性,副本集由多个mongodb数据库实例(节点)组成,三种角色
主节点(Primary),读写操作的节点
副节点/从节点(Secondary),从主节点复制数据集,备份数据,不可写,提供读操作(需要单独配置,我理解客户端需要单独连接从节点), 具有选举主节点的能力。
仲裁者(Arbiter),投票选举从节点成为主节点,同时也可以从节点,仲裁者不是必须的。
如果你的副本+主节点的个数是偶数,建议加一个仲裁者,形成奇数,容易满足大多数的投票。 如果你的副本+主节点的个数是奇数,可以不加仲裁者
一主两从的模式

主节点挂了,演变

一主一从一仲裁的模式

主节点挂了,演变

集群管理跟Redis\ElasticSearch的相似
-
负载均衡
2、安装
Window下的安装
1、下载地址 https://www.mongodb.com/download-center/community,选择版本4.2.5


2、配置MongoDB,让MongoDB作为服务运行,并配置好数据目录和日志目录

3、取消MongoDB Compass的安装选项(不取消安装极慢),需要可自行安装

4、双击mongo.exe可以运行MongoDB自带客户端,操作MongoDB

5、启动成功

移除MongoDB服务
# 只需使用管理员权限运行`cmd`工具,并输入如下命令
sc.exe delete MongoDB
配置文件为根目录下的mongod.cfg
安装为服务
# 运行命令需要用管理员权限
D:\developer\env\MongoDB\bin\mongod.exe --config "D:\developer\env\MongoDB\mongod.cfg" --install
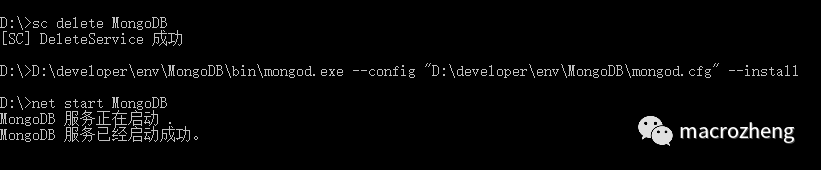
# 启动服务:
net start MongoDB
# 关闭服务:
net stop MongoDB
# 移除服务:
D:\developer\env\MongoDB\bin\mongod.exe --remove
Linux下的安装
我们使用docker安装,mysql也可以使用docker安装,直接运行它的镜像就可以了,按实际需要修改它的运行端口
1、从docker hub拉取镜像
docker pull mongo:4.2.5
2、启动mongo并创建用户
# 1.启动
docker run -p 27017:27017 --name mongo \
-v /mydata/mongo/db:/data/db \
-d mongo:4.2.5 --auth

# 2.进入运行mongodb的容器
docker exec -it mongo mongo

# 3.创建基于root角色的超级管理员帐号
use admin
db.createUser({
    user: 'mongoadmin',
    pwd: 'secret',
    roles: [ { role: "root", db: "admin" } ] });

# 4.验证是否可以登录
db.auth("mongoadmin","secret")
整个过程如下图:

MacOS下的安装
上官网,下载platform=macOS的社区版https://www.mongodb.com/try/download/community
将解压后的文件拷贝到任意位置,这里将以 /usr/local为例
sudo mv mongodb-macos-x86_64-6.0.0 /usr/local
配置环境变量
# 打开配置文件
cd ~
open .bash_profile
# 添加mongodb的位置
export PATH=${PATH}:/usr/local/mongodb/bin
# 让刚才输入的命令生效
source .bash_profile
# 运行命令,查看mongodb的版本
mongod -version
# 如果展示以下内容,说明安装成功
xjwdeMacBook:~ xjw$ mongod -version
db version v6.0.0
Build Info: {
    "version": "5.0.9",
    "gitVersion": "e61bf27c2f6a83fed36e5a13c008a32d563babe2",
    "modules": [],
    "allocator": "system",
    "environment": {
        "distarch": "x86_64",
        "target_arch": "x86_64"
    }
}
创建log与data目录
xjwdeMacBook:Downloads xjw$ cd /usr/local/mongodb-macos-x86_64-6.0.0/
xjwdeMacBook:mongodb-macos-x86_64-6.0.0 xjw$ mkdir data log
# 赋予读写权限,如果属主已有读写权限,则不用执行这步骤
xjwdeMacBook:mongodb-macos-x86_64-6.0.0 xjw$ sudo chown xjw log
xjwdeMacBook:mongodb-macos-x86_64-6.0.0 xjw$ sudo chown xjw data
配置文件,在mongodb根目录下创建etc文件夹,在etc下创建mongodb.conf,拷贝以下内容
# 数据库路径
dbpath=/usr/local/mongodb-macos-x86_64-5.0.9/data
# 日志输出路径
logpath=/usr/local/mongodb-macos-x86_64-5.0.9/log/mongo.log
# 错误日志采用追加模式,不会创建新的日志文件
logappend=true
# 启用日志文件,默认启用
journal=true
# 这个选项可以过滤一些无用的日志信息,若需要调试请设置为false
quiet=false
# 后台启动
fork=true
# 端口
port=27017
# 开启认证
auth=true
通过配置文件启动
# 启动命令
xjwdeMacBook:etc xjw$ mongod -f mongodb.conf
# 如果是新安装的mongodb,默认是没有用户的,所以我们新创建用户
# 进入命令行客户端
mongo
# 创建用户
db.createUser({user:'root',pwd:'123456',roles:[{role:'root',db:'admin'}]})
# 切换数据库
use admin
# 登录
db.auth('root','123456')
# 显示1 说明登录成功
# 赋予权限
db.grantRolesToUser('root',[{role:'hostManager',db:'admin'}])
## 关闭服务
use admin
db.shutdownServer({force:true})
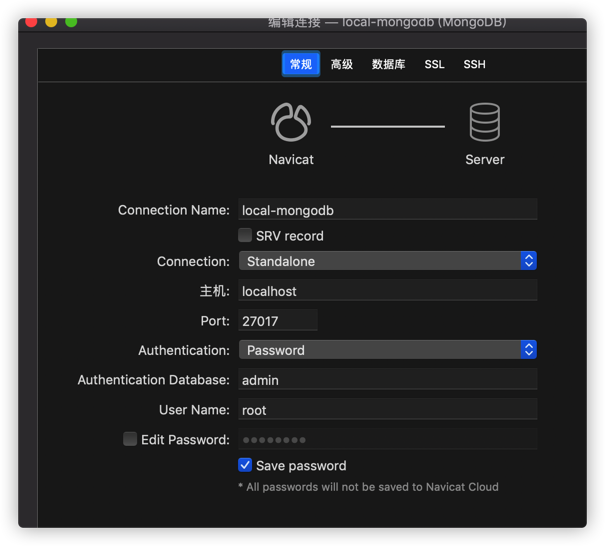
navicat 使用账号密码登录
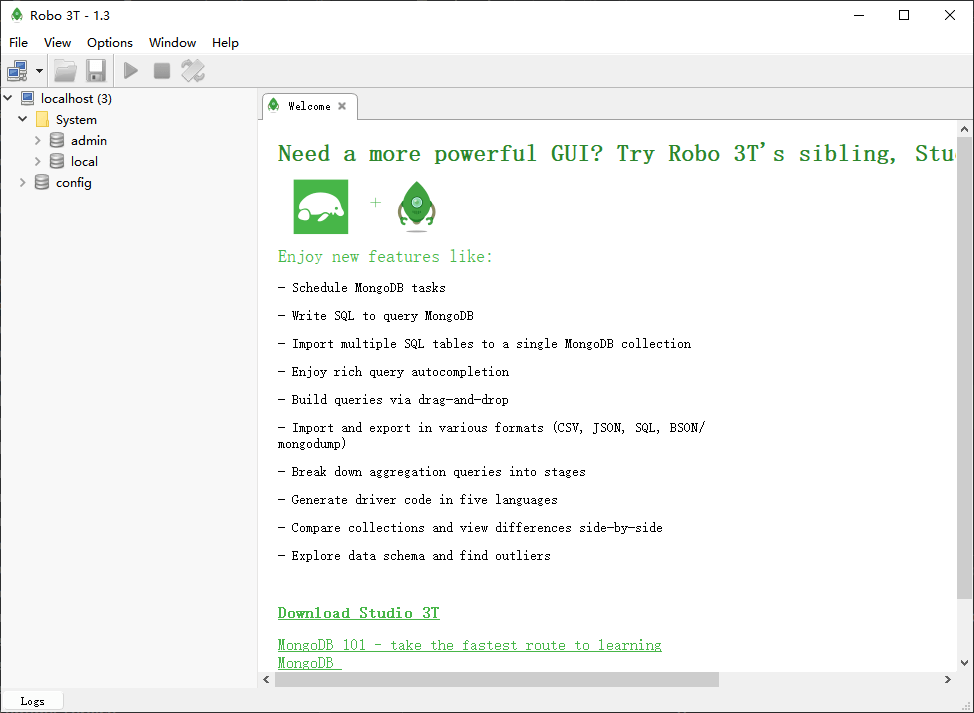
客户端工具
MongoDB的客户端工具有很多,navicat也可以,这里我们选择robo 3T
1、选择对应的系统版本(windows/mac/linux)下载https://robomongo.org/download
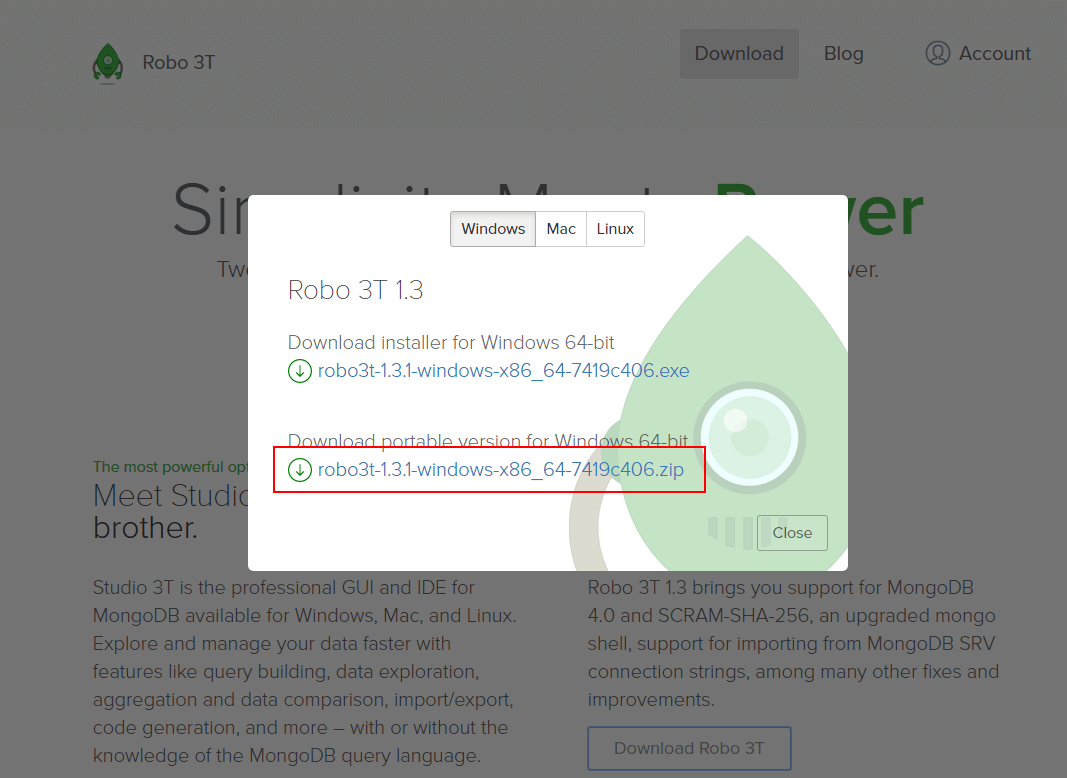
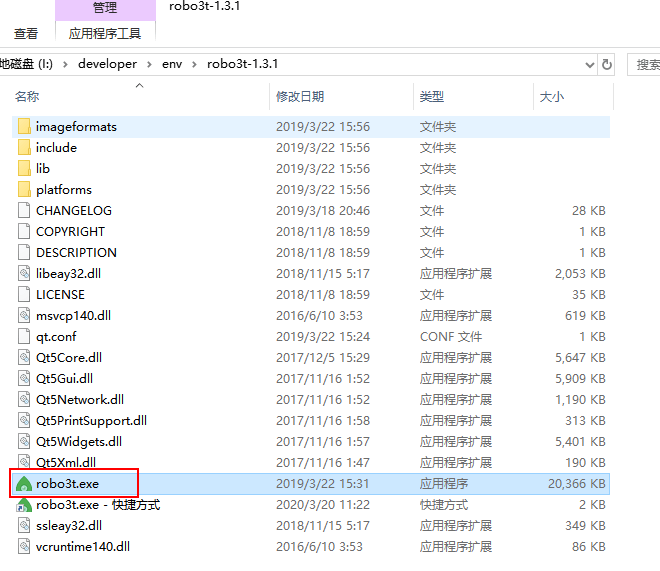
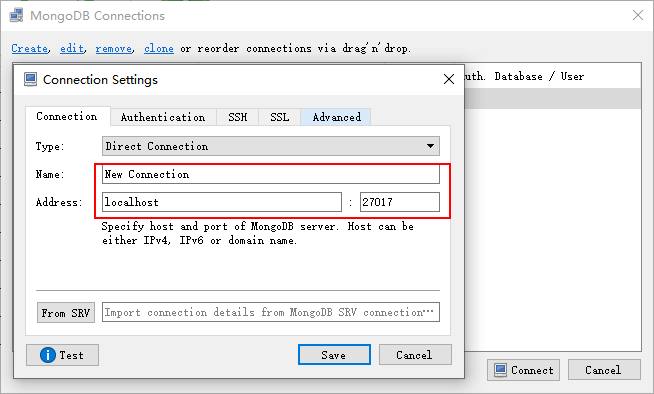
Windows
下载完成后解压,双击robo3t.exe即可使用;
创建mongodb的连接
3、类比关系型数据库概念
MongoDB是非关系型数据库当中最像关系型数据库的,我们可以对比关系型数据库的概念
| SQL概念 | MongoDB概念 | 说明 |
|---|---|---|
| Database | Database | 数据库 |
| table | collection | 数据库表/集合 |
| row | document | 数据记录行/文档 |
| column | field | 数据字段/域 |
| index | index | 索引 |
| primary key | primary key | 主键,MongoDB自动将_id字段设置为主键 |
字段类型
参考文档:https://blog.csdn.net/hejiancsdn/article/details/84869990
4、数据库操作
MongoDB里也有数据库的概念,我们来创建一个test数据库
创建数据库
# 1、使用use命令去创建数据库
> use test
switched to db test
# 当插入第一条数据时会创建数据库,并创建集合article,插入一个文档
> db.article.insert({name:"MongoDB 教程"})
WriteResult({ "nInserted" : 1 })
# 列出所有数据库
> show dbs
admin   0.000GB
config  0.000GB
local   0.000GB
test    0.000GB
删除数据库
# 2、使用db对象中的dropDatabase()方法来删除;
> db.dropDatabase()
{ "dropped" : "test", "ok" : 1 }
> show dbs
admin   0.000GB
config  0.000GB
local   0.000GB
5、集合操作
创建集合
# 切换数据库
> use test
switched to db test
# 使用db对象中的createCollection()方法来创建集合
> db.createCollection("article")
{ "ok" : 1 }
# 列出当前数据库下的所有集合
> show collections
article
删除集合
# 使用collection对象的drop()方法来删除集合
> db.article.drop()
true
> show collections
定容集合
这种集合与一般集合主要的区别是,它可以限制集合的容量大小,在数据写满的时候,又可以从头开始覆盖最开始的文档进行循环写入。
navicat设计集合是,定义集合最大大小和最大文档数

TTL 索引
time to live mongo的TTL机制,通过一个后台线程间隔读取集合中某个日期类型的索引,移除满足过期条件的文档。
1、一个特定时长后删除文档
举例,给logs集合的createTime字段创建TTL索引
db.logs.createIndex({"createTime":1},{"expireAfterSeconds": 3600})
createTime: 1 表示对 createTime 字段建立正序的索引,expireAfterSeconds: 3600表示 createTime值加上3600秒后过期
2、特定时间点后删除文档
在集合中增加expireDeleteTime 字段,当该时间点到期后,删除文档,举例数据结构如下:
{
    "_id": "5f43d5c00b34962beb026aad",
    "expireDeleteTime": ISODate("2020-09-02T11:44:11.528Z"),
    "requestTime": 1598281152423,
    "reportId": "15982811524236245975993217447",
}
给expireDeleteTime字段创建TTL索引
db.logs.createIndex({"expireDeleteTime":1},{"expireAfterSeconds": 0})
expireAfterSecond=0 意味着 expireDeleteTime到期后马上删除文档,考虑到mongodb的后台线程扫描间隔是60秒,所以最长是时间到期60后才删除。
6、文档操作
跟elasticsearch的文档概念是一样的
插入文档
通过collection对象的insert()方法向集合中插入文档,语法如下;
db.collection.insert(document)
向集合article插入一个文档
db.article.insert({title: 'MongoDB 教程',
    description: 'MongoDB 是一个 Nosql 数据库',
    by: 'Andy',
    url: 'https://www.mongodb.com/',
    tags: ['mongodb', 'database', 'NoSQL'],
    likes: 100
})
更新文档
1、通过collection对象的update()来更新集合中的文档,语法如下:
db.collection.update(
   <query>,
   <update>,
   {
     multi: <boolean>
   }
)
# query:修改的查询条件,类似于SQL中的WHERE部分
# update:更新属性的操作符,类似与SQL中的SET部分
# multi:设置为true时会更新所有符合条件的文档,默认为false只更新找到的第一条

# 例子:将title为MongoDB 教程的所有文档的title修改为MongoDB
db.article.update({'title':'MongoDB 教程'},{$set:{'title':'MongoDB'}},{multi:true})
2、save()方法可以用来替换已有文档,语法如下:
db.collection.save(document)
将ObjectId为5e9943661379a112845e4056的文档的title改为MongoDB 教程
db.article.save({
  "_id" : ObjectId("5e9943661379a112845e4056"),
    "title" : "MongoDB 教程",
    "description" : "MongoDB 是一个 Nosql 数据库",
    "by" : "Andy",
    "url" : "https://www.mongodb.com/",
    "tags" : [
        "mongodb",
        "database",
        "NoSQL"
    ],
    "likes" : 100.0
})
删除文档
通过collection对象的remove()方法来删除集合中的文档,语法如下
db.collection.remove(
   <query>,
   {
     justOne: <boolean>
   }
)
# query:删除的查询条件,类似于SQL中的WHERE部分
# justOne:设置为true只删除一条记录,默认为false删除所有记录
删除title为MongoDB 教程的所有文档
db.article.remove({'title':'MongoDB 教程'})
查询文档
-
通过collection对象的
find()方法来查询文档,语法如下db.collection.find(query, projection) # query:查询条件,类似于SQL中的WHERE部分 # projection:可选,使用投影操作符指定返回的键 # 查询article集合中的所有文档; db.article.find() # 返回 /* 1 */ { "_id" : ObjectId("5e994dcb1379a112845e4057"), "title" : "MongoDB 教程", "description" : "MongoDB 是一个 Nosql 数据库", "by" : "Andy", "url" : "https://www.mongodb.com/", "tags" : [ "mongodb", "database", "NoSQL" ], "likes" : 50.0 } /* 2 */ { "_id" : ObjectId("5e994df51379a112845e4058"), "title" : "Elasticsearch 教程", "description" : "Elasticsearch 是一个搜索引擎", "by" : "Ruby", "url" : "https://www.elastic.co/cn/", "tags" : [ "elasticearch", "database", "NoSQL" ], "likes" : 100.0 } /* 3 */ { "_id" : ObjectId("5e994e111379a112845e4059"), "title" : "Redis 教程", "description" : "Redis 是一个key-value数据库", "by" : "Andy", "url" : "https://redis.io/", "tags" : [ "redis", "database", "NoSQL" ], "likes" : 150.0 } -
条件查询,操作符号
操作 格式 SQL的类似语句 等于 {<key>:<value>} where title = ‘MongoDB 教程’ 小于 {<key>:{$lt:<value>}} where likes < 50 小于或等于 {<key>:{$lte:<value>}} where likes <= 50 大于 {<key>:{$gt:<value>}} where likes > 50 大于或等于 {<key>:{$gte:<value>}} where likes >= 50 不等于 {<key>:{$ne:<value>}} where likes != 50 # 1.查询title为MongoDB 教程的所有文档; db.article.find({"title":"MongoDB 教程"}) # 2.查询likes大于50的所有文档; db.article.find({"likes":{$gt:50}}) # 3.AND条件可以通过在find()方法传入多个键,以逗号隔开来实现,例如查询title为MongoDB 教程并且by为Andy的所有文档; db.article.find({'title':'MongoDB 教程','by':'Andy'}) # 4.OR条件可以通过使用$or操作符实现,例如查询title为Redis 教程或MongoDB 教程的所有文档; db.article.find({$or:[{"title":"Redis 教程"},{"title": "MongoDB 教程"}]}) # 5.AND和OR条件的联合使用,例如查询likes大于50,并且title为Redis 教程或者"MongoDB 教程的所有文档 db.article.find({"likes": {$gt:50}, $or: [{"title": "Redis 教程"},{"title": "MongoDB 教程"}]}) # 根据时间范围查询数据,ISODate("2021-06-03T20:57:00.00Z"),是一个标准时间格式,表示格林尼治时间(UTC) db.xxxx.find({"ct":{"$gt":ISODate("2017-04-20T01:16:33.303Z")}}) // 大于某个时间 db.xxxx.find({"ct":{"$lt":ISODate("2017-04-20T01:16:33.303Z")}}) // 小于某个时间 db.xxxx.find({"$and":[{"ct":{"$gt":ISODate("2017-04-20T01:16:33.303Z")}},{"ct":{"$lt":ISODate("2018-12-05T01:16:33.303Z")}}]}) // 某个时间段 db.xxxx.find({"ct":{"$gte":ISODate("2017-04-20T01:16:33.303Z"),"$lte":ISODate("2018-12-05T01:16:33.303Z")}}) //某个时间段 db.xxx.find({"createTime":{"$gt":ISODate("2021-06-03T20:57:00.00Z"),"$lt":ISODate("2021-06-03T20:59:00.00Z")}}) //某个时间段 db.push_log.find({"createTime":{$gt:new Date("2022-09-05 00:00:00")}})
mongo存储时间
mongos> new Date('2017-10-22 16:11:00'); # 普通输入时间时,表示这是一个本地时间,会被转换为UTC时间存储
ISODate("2017-10-22T08:11:00Z")  # 差8小时,存储UTC时间
mongos> new Date('2017-10-22 16:11:00Z'); # 后面加一个Z表示这就是一个UTC时间
ISODate("2017-10-22T16:11:00Z") # 没有减8
mongos> new Date('2017-10-22 16:11:00+08:00'); # 普通输入时间,指定时区:+8,东八区
ISODate("2017-10-22T08:11:00Z") #  差8小时,存储UTC时间
limit与skip操作
读取指定数量的文档,可以使用limit()方法,语法如下;
db.collection.find().limit(NUMBER)
只查询article集合中的2条数据
db.article.find().limit(2)
跳过指定数量的文档来读取,可以使用skip()方法,语法如下;
db.collection.find().limit(NUMBER).skip(NUMBER)
从第二条开始,查询article集合中的2条数据
db.article.find().limit(2).skip(1)
分页查询:
//创建查询,查出此条件下,总记录数
Query query = new Query();
Criteria criteria = new Criteria();
criteria.and("systemId").is(params.getSystemId());
criteria.and("platformId").is(params.getPlatformId());
if (StringUtils.isNotBlank(params.getTitle())) {
    criteria.and("title").is(params.getTitle());
}
query.addCriteria(criteria);
// 总数
int count = mongoTemplate.count(query, CarouselInfo.class);
// 分页查询
params.setCurPage(params.getCurPage() == null ? PageParameter.DEFAULT_CURR_PAGE : params.getCurPage());
params.setPageSize(params.getPageSize() == null ? PageParameter.DEFAULT_PAGE_SIZE : params.getPageSize());
//此处为第几页,从第几条开始查,公式和sql一样,根据业务自行设置
query.skip((params.getCurPage() - 1) * params.getPageSize());
//每页条数
query.limit(params.getPageSize());
//调用find(),查出符合条件的数据
List<CarouselInfo> carouselInfos = mongoTemplate.find(query, CarouselInfo.class);
排序
在MongoDB中使用sort()方法对数据进行排序,通过参数来指定排序的字段,并使用1和-1来指定排序方式,1为升序,-1为降序;
db.collection.find().sort({KEY:1})
按article集合中文档的likes字段降序排列;
db.article.find().sort({likes:-1})
索引
MongoDB的索引概念与关系型数据库如mysql的索引是一样,用来提高查询效率,
createIndex()方法来创建索引,语法如下
db.collection.createIndex(keys, options)
# background:建索引过程会阻塞其它数据库操作,设置为true表示后台创建,默认为false
# unique:设置为true表示创建唯一索引
# name:指定索引名称,如果没有指定会自动生成
给title和description字段创建索引,1表示升序索引,-1表示降序索引,指定以后台方式创建
db.article.createIndex({"title":1,"description":-1}, {background: true})
# 集合sys_config,在字段key上创建唯一索引
db.sys_config.createIndex({"key":1}, {"name":"uk_key","unique":true,"background":true})
查看article集合中已经创建的索引
db.article.getIndexes()

# 返回
[
    {
        "v" : 2,
        "key" : {
            "_id" : 1
        },
        "name" : "_id_",
        "ns" : "test.article"
    },
    {
        "v" : 2,
        "key" : {
            "title" : 1.0,
            "description" : -1.0
        },
        "name" : "title_1_description_-1",
        "ns" : "test.article",
        "background" : true
    }
]
聚合
类比ElasticSearch的聚合查询,MongoDB中的聚合使用aggregate()方法,类似于SQL中的group by语句,语法如下
db.collection.aggregate(AGGREGATE_OPERATION)
聚合中常用操作符如下
- $sum 总和
- $avg 平均值
- $min 最小值
- $max 最大值
根据by字段聚合文档并计算文档数量,类似与SQL中的count()函数
db.article.aggregate([{$group : {_id : "$by", sum_count : {$sum : 1}}}])

# 返回
/* 1 */
{
    "_id" : "Andy",
    "sum_count" : 2.0
}

/* 2 */
{
    "_id" : "Ruby",
    "sum_count" : 1.0
}
根据by字段聚合文档并计算likes字段的平局值,类似与SQL中的avg()语句
db.article.aggregate([{$group : {_id : "$by", avg_likes : {$avg : "$likes"}}}])

# 返回
/* 1 */
{
    "_id" : "Andy",
    "avg_likes" : 100.0
}

/* 2 */
{
    "_id" : "Ruby",
    "avg_likes" : 100.0
}
正则表达式
MongoDB使用$regex操作符来设置匹配字符串的正则表达式,可以用来模糊查询,类似于SQL中的like操作;
查询title中包含“教程”的文档
db.article.find({title:{$regex:"教程"}})
不区分大小写的模糊查询,使用$options操作符
db.article.find({title:{$regex:"elasticsearch",$options:"$i"}})
8、Java客户端集成MongoDB
作为了解即可。
依赖包
<dependency>
    <groupId>org.mongodb</groupId>
    <artifactId>mongo-java-driver</artifactId>
    <version>3.12.7</version>
</dependency>
<!-- 注意需要和服务器中的安装版本匹配-->
URI连接方式
# 1、标准URI连接语法
mongodb://username:password@host1:port1,host2:port2,...,hostN:portN/database?options
# username:password@:可选项,如果设置,在连接数据库服务器之后,驱动都会尝试登录这个数据库
# host1:port1:主机IP和端口号,必须指定至少一个host。如果要连接复制集,请指定多个主机地址
# /database:如果指定了username:password@,连接时会验证并登录指定数据库。若不指定,默认打开 test 数据库
# ?options:连接可选项,例如connectTimeoutMS=5000ms,表示连接等待时间最长 5 秒
# 3、使用用户名test,密码test登录 MongoDB 的test_db数据库
mongodb://test:test@127.0.0.1:27017/test_db
# 4、无密码连接指定三台服务器 (端口 27017, 27018, 和27019),默认打开test数据库
mongodb://127.0.0.1:27017,127.0.0.1:27018,127.0.0.1:27019
连接数据库
java代码如下:
private static MongoClient mongoClient;
// 静态代码块,项目启动前进行类加载就执行了
static {
    try {
        //连接到MongoDB服务 如果是远程连接可以替换“localhost”为服务器所在IP地址
        mongoClient = MongoClients.create("mongodb://test:test@127.0.0.1:27017/test_db");
        System.out.println("Connect to database successfully");
    } catch (Exception e) {
        System.err.println( e.getClass().getName() + ": " + e.getMessage() );
    }
}
创建集合
com.mongodb.client包里面都帮我们集成好了大部分常用的 api,我们可以通过MongoDatabase类中的createCollection()方法来创建集合。
创建一个tb_role集合,代码片段如下:
/**
 * 创建集合
 * @param args
 */
public static void main(String[] args) {
    // 连接到数据库
    MongoDatabase mongoDatabase = mongoClient.getDatabase("test_db");
    System.out.println("Connect to database successfully");
    mongoDatabase.createCollection("tb_role");
    System.out.println("集合创建成功");
}

/**
 * 删除集合
 * @param args
 */
public static void main(String[] args) {
    // 连接到数据库
    MongoDatabase mongoDatabase = mongoClient.getDatabase("test_db");
    System.out.println("Connect to database successfully");
    mongoDatabase.getCollection("tb_role").drop();
    System.out.println("集合 tb_role 删除成功");
}
文档操作
创建文档
/**
 * 插入文档
 * @param args
 */
public static void main(String[] args) {
    // 连接到数据库
    MongoDatabase mongoDatabase = mongoClient.getDatabase("test_db");
    System.out.println("Connect to database successfully");
    //获取集合
    MongoCollection<Document> collection = mongoDatabase.getCollection("tb_role");

    //向集合中插入文档
    Document document = new Document("name", "管理员").
            append("code", "manager").
            append("sort", 100);
    List<Document> documents = new ArrayList<>();
    documents.add(document);
    collection.insertMany(documents);
    System.out.println("文档插入成功");
}
更新文档
通过MongoCollection类中的updateMany()方法来更新集合中的文档
/**
 * 更新文档
 * @param args
 */
public static void main(String[] args) {
    // 连接到数据库
    MongoDatabase mongoDatabase = mongoClient.getDatabase("test_db");
    System.out.println("Connect to database successfully");
    //获取集合
    MongoCollection<Document> collection = mongoDatabase.getCollection("tb_role");

    //更新文档
    collection.updateMany(Filters.eq("code", "manager"), new Document("$set",new Document("name","经理")));

    //遍历所有文档
    FindIterable<Document> findIterable = collection.find();
    MongoCursor<Document> mongoCursor = findIterable.iterator();
    while(mongoCursor.hasNext()){
        System.out.println(mongoCursor.next());
    }
}
上文操作类似于 SQL语句中的update tb_role set name = '经理' where code = 'manager'!
删除文档
/**
 * 删除文档
 * @param args
 */
public static void main(String[] args) {
    // 连接到数据库
    MongoDatabase mongoDatabase = mongoClient.getDatabase("test_db");
    System.out.println("Connect to database successfully");
    //获取集合
    MongoCollection<Document> collection = mongoDatabase.getCollection("tb_role");

    //删除符合条件的第一个文档
    collection.deleteOne(Filters.eq("code", "manager"));
    //删除所有符合条件的文档
    collection.deleteMany (Filters.eq("code", "manager"));

    //遍历所有文档
    FindIterable<Document> findIterable = collection.find();
    MongoCursor<Document> mongoCursor = findIterable.iterator();
    while(mongoCursor.hasNext()){
        System.out.println(mongoCursor.next());
    }
}
在这里需要注意一下,在删除的时候,官方推荐尽可能先查询一下这个数据是否存在,如果存在,然后在执行删除操作,可以调用findOneAndDelete()方法进行删除!
查询文档
我们可以通过find()方法来获取集合中的所有文档。
/**
 * 查询文档
 * @param args
 */
public static void main(String[] args) {
    // 连接到数据库
    MongoDatabase mongoDatabase = mongoClient.getDatabase("test_db");
    System.out.println("Connect to database successfully");
    //获取集合
    MongoCollection<Document> collection = mongoDatabase.getCollection("tb_role");

    //遍历所有文档
    FindIterable<Document> findIterable = collection.find();
    MongoCursor<Document> mongoCursor = findIterable.iterator();
    while(mongoCursor.hasNext()){
        System.out.println(mongoCursor.next());
    }

    //查询当前集合所有文档数量
    long count = collection.countDocuments();
    System.out.println("当前文档数量:" + count);

    //带条件遍历文档
    FindIterable<Document> documentFindIterable = collection.find(Filters.eq("code", "manager"));
    MongoCursor<Document> documentMongoCursor = documentFindIterable.iterator();
    while(documentMongoCursor.hasNext()){
        System.out.println(documentMongoCursor.next());
    }
}
9、SpringBoot集成MongoDB
使用SpringData操作MongoDB,在coding老师的课程里有讲到,无论是SQL、NoSQL(非关系型数据库),在数据库操作底层都是使用SpringData封装的。
官网地址:https://spring.io/projects/spring-data
SpringData 封装大量的xxTemplate供我们直接操作数据库,十分方便,简化了企业开发。这里我们使用Spring Data MongoDB 这个依赖包。
配置连接
1、pom.xml导入依赖
<dependency>
  <groupId>org.springframework.boot</groupId>
  <artifactId>spring-boot-starter-data-mongodb</artifactId>
</dependency>
2、application.yml 配置文件
mongodb:
 host: localhost # mongodb的连接地址
 port: 27017 # mongodb的连接端口号
 database: mall-port # mongodb的连接的数据库
 authentication-database: admin
上面只适合单机连接,authentication-database 是用户账号密码所在的库,认证时需要用到。
使用uri的方式连接单机或者副本集
# mongodb 单机连接
spring.data.mongodb.uri=mongodb://test123:test123@127.0.0.1:27017/test_db?authSource=admin
# mongodb 副本集连接
spring.data.mongodb.uri=mongodb://app_admin:63725a94a59f09468015@10.213.53.13:37017,10.213.53.14:37017,10.213.53.15:37017/app_msg_dev?authSource=admin&replicaSet=configs&readPreference=secondaryPreferred&connectTimeoutMS=30000&socketTimeout=30000&socketKeepAlive=true&retryWrites=true
# mongodb映射实体类,去掉字段_class
spring.data.mongodb.remove.class=true
replicaSet=repl 指定副本集名称,authSource是验证数据库,就是上面的authentication-database属性,没有配这个参数连接mongodb时就会报Authentication failed异常,一般authSource是admin,如果不对,项目启动的时候也会报Authentication failed异常,需要authSource改为正确的验证数据库,或许你使用的mong库就是验证库了。

在mongodb的社区有这个错误的帖子:https://www.mongodb.com/community/forums/t/mongodb-authentication-failed-with-spring-data-uri/109256
uri常见option参数
| option参数 | 可选值 | 说明 |
|---|---|---|
| authSource | 开启认证的database | |
| authMechanism | SCRAM-SHA-1 MONGODB-CR (Deprecated in MongoDB 3.6) MONGODB-X509 GSSAPI (Kerberos) PLAIN (LDAP SASL) | 认证方式 |
| maxIdleTimeMS | 毫秒数,默认0,不限制 | 最大空闲时间,为避免springboot使用被服务端关闭了的连接线程,设置空闲时间springboot主动关闭空闲连接,下次使用时创建新连接,避免使用失效的连接,不能设置0 |
| maxLifeTimeMS | 毫秒数,默认0,不限制 | 最大生存时间 |
| maxPoolSize | 默认100 | 最大连接数 |
| minPoolSize | 默认0 | 最小连接数 |
| waitQueueMultiple | 默认5 | 每个连接的队列等待数量 |
| waitQueueTimeoutMS | 默认180 | 线程的最长等待时间 |
| slaveOk | true/false | 是否从slave节点读取数据 |
| readPreference | primary 主节点(默认值) primaryPrefered 优先主节点,不可用则选择从节点 secondary 从节点 secondaryPrefered 优先从节点,不可用则选择主节点 nearest 选择最近的节点 |
副本集的读取策略,覆盖slaveOk |
| connectTimeoutMS | 连接超时时间 | |
| socketTimeout | 获取连接后,mongodb client端与server端的socket通信网络等待时间 | |
| autoConnectRetry | true/false | 自动尝试连接重试 |
| socketKeepAlive | true/false |
3、声明文档(实体类)
package com.macro.mall.tiny.nosql.mongodb.document;

import org.springframework.data.annotation.Id;
import org.springframework.data.mongodb.core.index.Indexed;
import org.springframework.data.mongodb.core.mapping.Document;
import java.util.Date;

/**
     * 用户商品浏览历史记录
     * Created by macro on 2018/8/3.
     */
@Document // 映射到Mongodb文档上的领域对象
public class MemberReadHistory {
  @Id // 文档的ID字段
  private String id;
  @Indexed // 映射到Mongodb文档的索引字段
  private Long memberId;
  private String memberNickname;
  private String memberIcon;
  @Indexed
  private Long productId;
  private String productName;
  private String productPic;
  private String productSubTitle;
  private String productPrice;
  private Date createTime;

  //省略了所有getter和setter方法
}

@Document(collection="persons")
public class Person implements Serializable {
    private static final long serialVersionUID = -3258839839160856613L;

 /**
     * 使用@Id注解指定MongoDB中的 _id 主键
     */
    @Id
    private Long id;

    private String userName;

    private String passWord;

    private Integer age;

    private Date createTime;

    //...get/set

    @Override
    public String toString() {
        return "Person{" +
                "id=" + id +
                ", userName='" + userName + '\'' +
                ", passWord='" + passWord + '\'' +
                ", age=" + age +
                ", createTime=" + createTime +
                '}';
    }
}
JPA方式
jpa支持命名式查询和@Query注解查询,我个人不太喜欢,之前写的文章关于JPA的入门
http://47.113.95.179/vuepress-blog/base-admin/2021-01-29-orm-jpa.html#_1%E3%80%81springdata
1、继承MongoRepository接口,这样就拥有了一些基本的Mongodb数据操作方法,
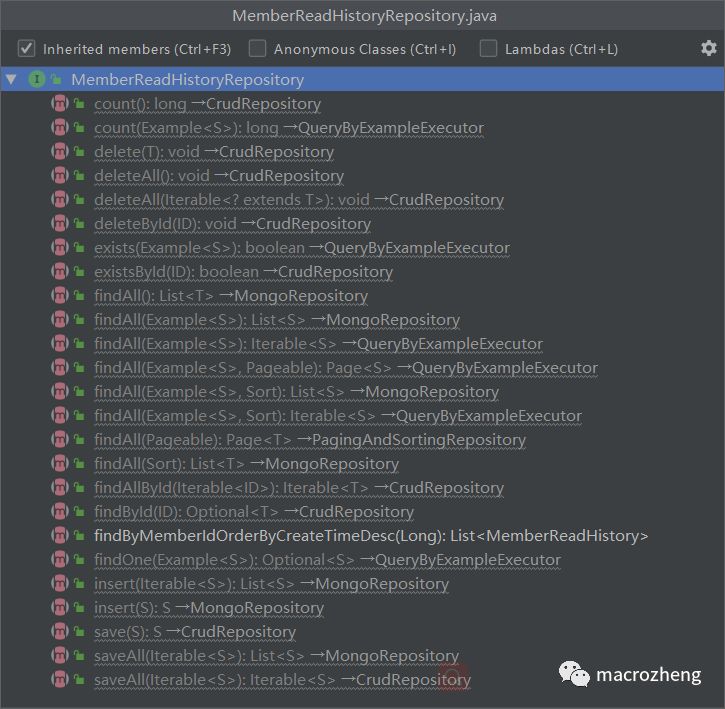
public interface MemberReadHistoryRepository extends MongoRepository<MemberReadHistory,String> {
    /**
     * 自定义的文档查询方法
     * 根据会员id按时间倒序获取浏览记录
     * @param memberId 会员id
     */
    List<MemberReadHistory> findByMemberIdOrderByCreateTimeDesc(Long memberId);
}
findByMemberIdOrderByCreateTimeDesc()是自定义的衍生查询,在接口中直接指定查询方法名称便可查询,无需进行实现,它是根据会员id按时间倒序获取浏览记录的意思,在idea中它会直接提示对应字段帮助你定义查询方法名称。
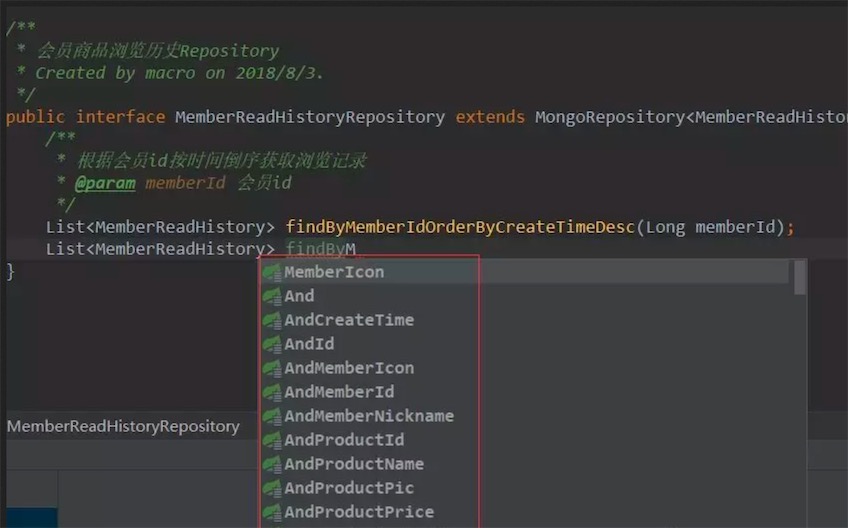
当然有些带条件的查询我们可以使用@Query注解,更简洁一些
@Query("{ 'memberId' : ?0 }")
List<MemberReadHistory> findByMemberId(Long memberId);
2、Service层
业务层接口MemberReadHistoryService.java
import com.macro.mall.tiny.nosql.mongodb.document.MemberReadHistory;
import java.util.List;

/**
 * 会员浏览记录管理Service
 * Created by macro on 2018/8/3.
 */
public interface MemberReadHistoryService {
    /**
     * 生成浏览记录
     */
    int create(MemberReadHistory memberReadHistory);

    /**
     * 批量删除浏览记录
     */
    int delete(List<String> ids);

    /**
     * 获取用户浏览历史记录
     */
    List<MemberReadHistory> list(Long memberId);
}
业务层接口实现类MemberReadHistoryServiceImpl.java
import com.macro.mall.tiny.nosql.mongodb.document.MemberReadHistory;

import com.macro.mall.tiny.nosql.mongodb.repository.MemberReadHistoryRepository;
import com.macro.mall.tiny.service.MemberReadHistoryService;
import org.springframework.beans.factory.annotation.Autowired;
import org.springframework.stereotype.Service;

import java.util.ArrayList;
import java.util.Date;
import java.util.List;

/**
 * 会员浏览记录管理Service实现类
 * Created by macro on 2018/8/3.
 */
@Service
public class MemberReadHistoryServiceImpl implements MemberReadHistoryService {

    @Autowired
    private MemberReadHistoryRepository memberReadHistoryRepository;

    @Override
    public int create(MemberReadHistory memberReadHistory) {
        memberReadHistory.setId(null);
        memberReadHistory.setCreateTime(new Date());
        memberReadHistoryRepository.save(memberReadHistory);
        return 1;

    }

    @Override
    public int delete(List<String> ids) {
        List<MemberReadHistory> deleteList = new ArrayList<>();
        for(String id:ids){
            MemberReadHistory memberReadHistory = new MemberReadHistory();
            memberReadHistory.setId(id);
            deleteList.add(memberReadHistory);
        }
        memberReadHistoryRepository.deleteAll(deleteList);
        return ids.size();
    }

    @Override
    public List<MemberReadHistory> list(Long memberId) {
        return memberReadHistoryRepository.findByMemberIdOrderByCreateTimeDesc(memberId);
    }
}
3、Web层控制类MemberReadHistoryController.java
import com.macro.mall.tiny.common.api.CommonResult;
import com.macro.mall.tiny.nosql.mongodb.document.MemberReadHistory;
import com.macro.mall.tiny.service.MemberReadHistoryService;
import io.swagger.annotations.Api;
import io.swagger.annotations.ApiOperation;
import org.springframework.beans.factory.annotation.Autowired;
import org.springframework.stereotype.Controller;
import org.springframework.web.bind.annotation.*;
import java.util.List;
/**
* 会员商品浏览记录管理Controller
* Created by macro on 2018/8/3.
*/
@Controller
@Api(tags = "MemberReadHistoryController", description = "会员商品浏览记录管理")
@RequestMapping("/member/readHistory")
public class MemberReadHistoryController {
@Autowired
private MemberReadHistoryService memberReadHistoryService;
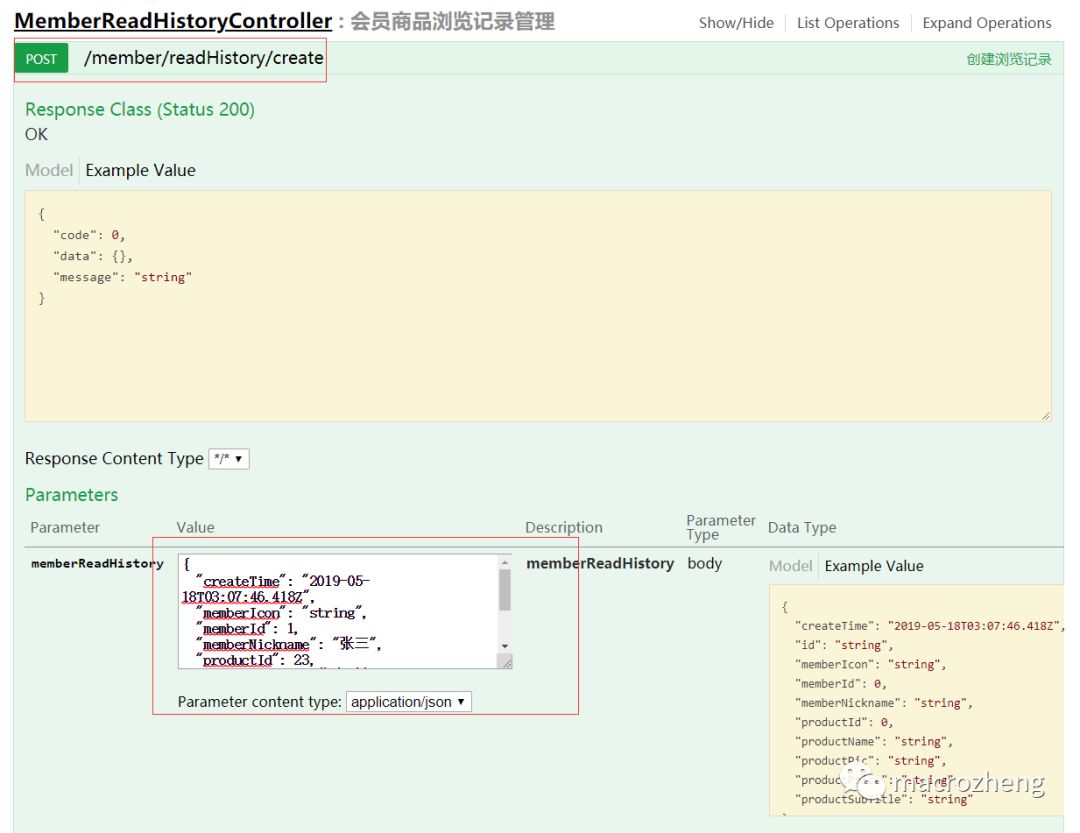
@ApiOperation("创建浏览记录")
@RequestMapping(value = "/create", method = RequestMethod.POST)
@ResponseBody
public CommonResult create(@RequestBody MemberReadHistory memberReadHistory) {
int count = memberReadHistoryService.create(memberReadHistory);
if (count > 0) {
return CommonResult.success(count);
} else {
return CommonResult.failed();
}
}
@ApiOperation("删除浏览记录")
@RequestMapping(value = "/delete", method = RequestMethod.POST)
@ResponseBody
public CommonResult delete(@RequestParam("ids") List<String> ids) {
int count = memberReadHistoryService.delete(ids);
if (count > 0) {
return CommonResult.success(count);
} else {
return CommonResult.failed();
}
}
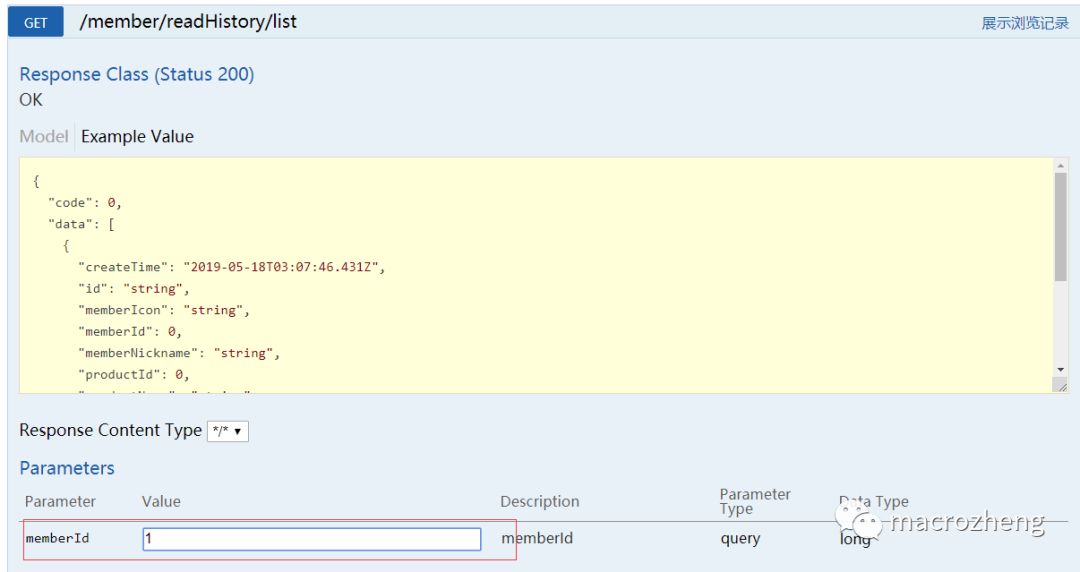
@ApiOperation("展示浏览记录")
@RequestMapping(value = "/list", method = RequestMethod.GET)
@ResponseBody
public CommonResult<List<MemberReadHistory>> list(Long memberId) {
List<MemberReadHistory> memberReadHistoryList = memberReadHistoryService.list(memberId);
return CommonResult.success(memberReadHistoryList);
}
}
4、启动项目,使用swagger进行接口测试
添加商品浏览记录到Mongodb
查询Mongodb中的商品浏览记录
测试项目源码地址
https://github.com/macrozheng/mall-learning/tree/master/mall-tiny-07
Template方式
采用 Spring Data MongoDB 封装的 MongoDB 官方 Java 驱动 MongoTemplate 对 MongoDB 进行操作,这种方式非常灵活,能满足绝大部分需求。
插入文档
@RunWith(SpringRunner.class)
@SpringBootTest
public class PersonServiceTest {

    @Autowired
    private MongoTemplate mongoTemplate;

    /**
     * 插入文档
     * @throws Exception
     */
    @Test
    public void insert() throws Exception {
        Person person =new Person();
        person.setId(1l);
        person.setUserName("张三");
        person.setPassWord("123456");
        person.setCreateTime(new Date());
        mongoTemplate.insert(person);
    }
}
没指定集合名称时,会取@Document注解中的集合名称。指定插入文档的集合名称
@Test
public void insertCustomCollection() throws Exception {
  Person person =new Person();
  person.setId(1l);
  person.setUserName("张三");
  person.setPassWord("123456");
  person.setCreateTime(new Date());
  mongoTemplate.insert(person, "custom_person");
}
批量插入文档,必须指定集合名称
@Test
public void insertBatch() throws Exception {
  List<Person> personList = new ArrayList<>();
  Person person1 =new Person();
  person1.setId(10l);
  person1.setUserName("张三");
  person1.setPassWord("123456");
  person1.setCreateTime(new Date());
  personList.add(person1);

  Person person2 =new Person();
  person2.setId(11l);
  person2.setUserName("李四");
  person2.setPassWord("123456");
  person2.setCreateTime(new Date());
  personList.add(person2);

  mongoTemplate.insert(personList, "custom_person");
}
存储文档
在存储文档的时候会通过主键ID进行判断,如果存在就更新,否则就插入
/**
     * 存储文档,如果没有插入,否则更新
     * @throws Exception
     */
@Test
public void save() throws Exception {
  Person person =new Person();
  person.setId(13l);
  person.setUserName("八八");
  person.setPassWord("123456");
  person.setAge(40);
  person.setCreateTime(new Date());
  mongoTemplate.save(person);
}
更新文档
MongoTemplate提供了updateFirst()和updateMulti()方法,用于更新文档
/**
     * 更新文档,匹配查询到的文档数据中的第一条数据
     * @throws Exception
     */
@Test
public void updateFirst() throws Exception {
  //更新对象
  Person person =new Person();
  person.setId(1l);
  person.setUserName("张三123");
  person.setPassWord("123456");
  person.setCreateTime(new Date());

  //更新条件
  Query query= new Query(Criteria.where("id").is(person.getId()));

  //更新值
  Update update= new Update().set("userName", person.getUserName()).set("passWord", person.getPassWord());
  //更新查询满足条件的文档数据(第一条)
  UpdateResult result =mongoTemplate.updateFirst(query,update, Person.class);
  if(result!=null){
    System.out.println("更新条数:" + result.getMatchedCount());
  }
}

/**
更新文档,匹配查询到的文档数据中的所有数据
**/
@Test
public void updateMany() throws Exception {
  //更新对象
  Person person =new Person();
  person.setId(1l);
  person.setUserName("张三");
  person.setPassWord("123456");
  person.setCreateTime(new Date());

  //更新条件
  Query query= new Query(Criteria.where("id").is(person.getId()));

  //更新值
  Update update= new Update().set("userName", person.getUserName()).set("passWord", person.getPassWord());
  //更新查询满足条件的文档数据(全部)
  UpdateResult result = mongoTemplate.updateMulti(query, update, Person.class);
  if(result!=null){
    System.out.println("更新条数:" + result.getMatchedCount());
  }
}

/**
upsert 插入或更新数据
**/
@Override
public void save(SysConfigSaveVO sysConfig) {
    Query query = new Query(Criteria.where("key").is(sysConfig.getKey()));
    Date now = new Date();
    Update update = new Update();
    update.setOnInsert(SysConfig.FIELD_KEY,sysConfig.getKey());
    update.setOnInsert(SysConfig.FIELD_CREATE_TIME,now);
    update.set(SysConfig.FIELD_VALUE,sysConfig.getValue());
    update.set(SysConfig.FIELD_UPDATE_TIME,now);
    if(StringUtils.isNotBlank(sysConfig.getRemark())){
        update.set(SysConfig.FIELD_REMARK,sysConfig.getRemark());
    }
    mongoTemplate.upsert(query,update,"sys_config");
}
删除文档
/**
     * 删除符合条件的所有文档
     * @throws Exception
     */
@Test
public void remove() throws Exception {
  Person person =new Person();
  person.setId(1l);
  person.setUserName("张三");
  person.setPassWord("123456");
  person.setCreateTime(new Date());

  Query query = new Query(Criteria.where("userName").is(person.getUserName()));
  DeleteResult result = mongoTemplate.remove(query, Person.class);
  System.out.println("删除条数:" + result.getDeletedCount());
}

 /**
     * 删除符合条件的单个文档,并返回删除的文档
     * @throws Exception
     */
@Test
public void findAndRemove() throws Exception {
  Person person =new Person();
  person.setId(1l);
  person.setUserName("张三");
  person.setPassWord("123456");
  person.setCreateTime(new Date());

  Query query = new Query(Criteria.where("id").is(person.getId()));
  Person result = mongoTemplate.findAndRemove(query, Person.class);
  System.out.println("删除的文档数据:" + result.toString());
}

/**
     * 删除符合条件的所有文档,并返回删除的文档
     * @throws Exception
     */
@Test
public void findAllAndRemove() throws Exception {
  Person person =new Person();
  person.setId(1l);
  person.setUserName("张三");
  person.setPassWord("123456");
  person.setCreateTime(new Date());

  Query query = new Query(Criteria.where("id").is(person.getId()));
  List<Person> result = mongoTemplate.findAllAndRemove(query, Person.class);
  System.out.println("删除的文档数据:" + result.toString());
}
批量操作
-
批量插入或更新数据
@Override
public void saveChannels(String deviceId,List<DeviceChannelDTO> channels) {
    //没有渠道,则对该设备下的渠道进行清空
    if(CollectionUtils.isEmpty(channels)){
        Query query = new Query(Criteria.where(DeviceChannelConstant.FIELD_DEVICE_ID).is(deviceId));
        mongoTemplate.remove(query,DeviceChannelConstant.DB_COLLECTION);
        return;
    }

    //构建批量更新操作项
    List<Pair<Query, Update>> batchUpdateOps = this.buildBatchUpdateOps(deviceId, channels);

    //执行批量更新
    BulkOperations bulkOps = mongoTemplate.bulkOps(BulkOperations.BulkMode.UNORDERED, DeviceChannelConstant.DB_COLLECTION).upsert(batchUpdateOps);
    BulkWriteResult upsertRet = bulkOps.execute();
}

private List<Pair<Query, Update>> buildBatchUpdateOps(String deviceId,List<DeviceChannelDTO> channels) {
    Date now = new Date();

    //定义批量更新操作项
    List<Pair<Query, Update>> result = new ArrayList<>();
    channels.stream().forEach(channel -> {
        //定义更新条件
        Criteria where=Criteria.where(DeviceChannelConstant.FIELD_DEVICE_ID).is(deviceId);
        where.and(DeviceChannelConstant.FIELD_MSG_TYPE).is(channel.getMsgType());
        Query query = new Query(where);
        //定义更新内容
        Update update = new Update();
        update.setOnInsert(DeviceChannelConstant.FIELD_DEVICE_ID, deviceId);
        update.setOnInsert(DeviceChannelConstant.FIELD_MSG_TYPE, channel.getMsgType());
        update.setOnInsert(DeviceChannelConstant.FIELD_CREATE_TIME, now);
        update.set(DeviceChannelConstant.FIELD_CHANNEL_DEVICE_ID,channel.getChannelDeviceId());
        update.set(DeviceChannelConstant.FIELD_CHANNEL,channel.getChannel());
        update.set(DeviceChannelConstant.FIELD_UPDATE_TIME,now);

        Pair<Query, Update> updatePair = Pair.of(query, update);
        result.add(updatePair);
    });

    return result;
}
查询文档
// 1、查询集合中的全部文档数据
@Test
public void findAll() throws Exception {
  List<Person> result = mongoTemplate.findAll(Person.class);
  System.out.println("查询结果:" + result.toString());
}

// 2、查询集合中指定的ID文档数据
@Test
public void findById() {
  long id = 1l;
  Person result = mongoTemplate.findById(id, Person.class);
  System.out.println("查询结果:" + result.toString());
}

// 3、根据条件查询集合中符合条件的文档,返回第一条数据
@Test
public void findOne() {
  String userName = "张三";
  Query query = new Query(Criteria.where("userName").is(userName));
  Person result = mongoTemplate.findOne(query, Person.class);
  System.out.println("查询结果:" + result.toString());
}

// 4、根据条件查询集合中符合条件的文档
@Test
public void findByCondition() {
  String userName = "张三";
  Query query = new Query(Criteria.where("userName").is(userName));
  List<Person> result = mongoTemplate.find(query, Person.class);
  System.out.println("查询结果:" + result.toString());
}

// 5、根据【AND】关联多个查询条件,查询集合中的文档数据
@Test
public void findByAndCondition() {
  // 创建条件
  Criteria criteriaUserName = Criteria.where("userName").is("张三");
  Criteria criteriaPassWord = Criteria.where("passWord").is("123456");
  // 创建条件对象,将上面条件进行 AND 关联
  Criteria criteria = new Criteria().andOperator(criteriaUserName, criteriaPassWord);
  // 创建查询对象,然后将条件对象添加到其中
  Query query = new Query(criteria);
  List<Person> result = mongoTemplate.find(query, Person.class);
  System.out.println("查询结果:" + result.toString());
}

// 6、根据【OR】关联多个查询条件,查询集合中的文档数据
@Test
public void findByOrCondition() {
  // 创建条件
  Criteria criteriaUserName = Criteria.where("userName").is("张三");
  Criteria criteriaPassWord = Criteria.where("passWord").is("123456");
  // 创建条件对象,将上面条件进行 OR 关联
  Criteria criteria = new Criteria().orOperator(criteriaUserName, criteriaPassWord);
  // 创建查询对象,然后将条件对象添加到其中
  Query query = new Query(criteria);
  List<Person> result = mongoTemplate.find(query, Person.class);
  System.out.println("查询结果:" + result.toString());
}

// 7、根据【IN】关联多个查询条件,查询集合中的文档数据
@Test
public void findByInCondition() {
  // 设置查询条件参数
  List<Long> ids = Arrays.asList(1l, 10l, 11l);
  // 创建条件
  Criteria criteria = Criteria.where("id").in(ids);
  // 创建查询对象,然后将条件对象添加到其中
  Query query = new Query(criteria);
  List<Person> result = mongoTemplate.find(query, Person.class);
  System.out.println("查询结果:" + result.toString());
}

// 8、根据【逻辑运算符】查询集合中的文档数据
@Test
public void findByOperator() {
  // 设置查询条件参数
  int min = 20;
  int max = 35;
  Criteria criteria = Criteria.where("age").gt(min).lte(max);
  // 创建查询对象,然后将条件对象添加到其中
  Query query = new Query(criteria);
  List<Person> result = mongoTemplate.find(query, Person.class);
  System.out.println("查询结果:" + result.toString());
}

// 9、根据【正则表达式】查询集合中的文档数据
@Test
public void findByRegex() {
  // 设置查询条件参数
  String regex = "^张*";
  Criteria criteria = Criteria.where("userName").regex(regex);
  // 创建查询对象,然后将条件对象添加到其中
  Query query = new Query(criteria);
  List<Person> result = mongoTemplate.find(query, Person.class);
  System.out.println("查询结果:" + result.toString());
}

// 10、根据条件查询集合中符合条件的文档,获取其文档列表并排序
@Test
public void findByConditionAndSort() {
  String userName = "张三";
  Query query = new Query(Criteria.where("userName").is(userName)).with(Sort.by("age"));
  List<Person> result = mongoTemplate.find(query, Person.class);
  System.out.println("查询结果:" + result.toString());
}

// 11、根据单个条件查询集合中的文档数据,并按指定字段进行排序与限制指定数目
@Test
public void findByConditionAndSortLimit() {
  String userName = "张三";
  //从第一行开始,查询2条数据返回
  Query query = new Query(Criteria.where("userName").is(userName)).with(Sort.by("createTime")).limit(2).skip(1);
  List<Person> result = mongoTemplate.find(query, Person.class);
  System.out.println("查询结果:" + result.toString());
}

// 12、统计集合中符合【查询条件】的文档【数量】
@Test
public void countNumber() {
  // 设置查询条件参数
  String regex = "^张*";
  Criteria criteria = Criteria.where("userName").regex(regex);
  // 创建查询对象,然后将条件对象添加到其中
  Query query = new Query(criteria);
  long count = mongoTemplate.count(query, Person.class);
  System.out.println("统计结果:" + count);
}
创建索引
mongodb的索引跟关系型数据库的索引是一样的,用来提高查询速度
@RunWith(SpringRunner.class)
@SpringBootTest
public class PersonServiceTest {
  @Autowired
  private MongoTemplate mongoTemplate;

  // 1、创建升序索引
  @Test
  public void createAscendingIndex() {
    // 设置字段名称
    String field = "userName";
    // 创建索引
  mongoTemplate.getCollection("persons").createIndex(Indexes.ascending(field));
  }

  // 2、根据索引名称移除索引
  @Test
  public void removeIndex() {
    // 设置字段名称
    String field = "userName";
    // 删除索引
    mongoTemplate.getCollection("persons").dropIndex(field);
  }

  // 3、查询集合中所有的索引
  @Test
  public void getIndexAll() {
    // 获取集合中所有列表
    ListIndexesIterable<Document> indexList = mongoTemplate.getCollection("persons").listIndexes();
    // 获取集合中全部索引信息
    for (Document document : indexList) {
      System.out.println("索引列表:" + document);
    }
  }
}
我们还可以通过在实体类上加注解方式来创建索引
@Document(collection="persons")
public class Person implements Serializable {
    private static final long serialVersionUID = -3258839839160856613L;

 /**
     * 使用@Id注解指定MongoDB中的 _id 主键
     */
    @Id
    private Long id;

    private String userName;

    private String passWord;

    private Integer age;

 /**
     * 创建一个5秒之后文档自动删除的索引
     */
    @Indexed(expireAfterSeconds=5)
    private Date createTime;

    //...get/set

    @Override
    public String toString() {
        return "Person{" +
                "id=" + id +
                ", userName='" + userName + '\'' +
                ", passWord='" + passWord + '\'' +
                ", age=" + age +
                ", createTime=" + createTime +
                '}';
    }
}
Plus 版
就像mybatis-plus对mybatis的扩展,starter-mongodb-plus是对starter-mongod的扩展,pom.xml导入依赖
<dependency>
    <groupId>com.spring4all</groupId>
    <artifactId>mongodb-plus-spring-boot-starter</artifactId>
    <version>1.0.0.RELEASE</version>
</dependency>
yaml配置,下面是默认配置
spring.data.mongodb.option.min-connection-per-host=0
spring.data.mongodb.option.max-connection-per-host=100
spring.data.mongodb.option.threads-allowed-to-block-for-connection-multiplier=5
# 选择服务器超时时间,单位毫秒
spring.data.mongodb.option.server-selection-timeout=30000
# 线程池中连接变为可用的最长等待时间,单位毫秒
spring.data.mongodb.option.max-wait-time=120000
# 线程池中连接的最大空闲时间,单位毫秒,0不限制
spring.data.mongodb.option.max-connection-idle-time=0
# 线程池中连接的最大生存时间,单位毫秒,0不限制
spring.data.mongodb.option.max-connection-life-time=0
# 连接的最长时间,单位毫秒
spring.data.mongodb.option.connect-timeout=10000
spring.data.mongodb.option.socket-timeout=0

spring.data.mongodb.option.socket-keep-alive=false
spring.data.mongodb.option.ssl-enabled=false
spring.data.mongodb.option.ssl-invalid-host-name-allowed=false
spring.data.mongodb.option.always-use-m-beans=false

spring.data.mongodb.option.heartbeat-socket-timeout=20000
spring.data.mongodb.option.heartbeat-connect-timeout=20000
spring.data.mongodb.option.min-heartbeat-frequency=500
spring.data.mongodb.option.heartbeat-frequency=10000
spring.data.mongodb.option.local-threshold=15
启动类开启@EnableMongoPlus注解
@EnableMongoPlus
@SpringBootApplication
public class Application {

    public static void main(String[] args) {
        SpringApplication.run(Application.class, args);
    }
}
异常
1、com.mongodb.MongoSocketReadException: Prematurely reached end of stream、
调整options参数
# 线程池中连接的最大空闲时间,30分钟
maxConnectionIdleTime = 30*60*1000
# socket连接保活
socketKeepAlive = true
2、com.mongodb.MongoSocketWriteException: Exception sending message
使用了失效的连接导致
spring:
  data:
    mongodb:
      option:
        max-connection-idle-time: 3600000 #空闲一个小时清理一下
        socket-keep-alive: true
        min-connection-per-host: 1 # 设置最小连接数
mongodb版本不支持参数

uri连接修改options参数
mongodb://app_admin:63725a94a59f09468015@10.213.53.13:37017,10.213.53.14:37017,10.213.53.15:37017/app_msg_sit?authSource=admin&replicaSet=configs&readPreference=secondaryPreferred&maxIdleTimeMS=1800000&minPoolSize=5&retryWrites=true
10、MongoDB的事务
单节点 mongodb 不支持事务,需要搭建 MongoDB 复制集(集群),与大多数ORM框架一样,需要配置事务管理器并注入到Spring 的beanFactory
/**
 * 配置事务管理器
 */
@Configuration
public class TransactionConfig {
    @Bean
    MongoTransactionManager transactionManager(MongoDatabaseFactory dbFactory) {
        return new MongoTransactionManager(dbFactory);
    }
}
事务测试
@Service
public class TransactionExample {
    @Autowired
    private MongoTemplate mongoTemplate;

    @Transactional(rollbackFor = Exception.class)
    public Object transactionTest(){
        Person person =new Person();
        person.setId(1l);
        person.setUserName("张三");
        person.setPassWord("123456");
        person.setCreateTime(new Date());
        Person newPerson = mongoTemplate.insert(person);
        // 抛出异常,观察数据是否进行回滚
        if(1 == 1){
            throw new RuntimeException("异常");
        }
        return newPerson;
    }
}
demo获取地址:https://github.com/justdojava/springboot-example-mongodb